Showing posts sorted by date for query dress up cookies. Sort by relevance Show all posts

Friday, August 22, 2014

Make Your Own Ice Cream Party for Bubble's 10th Birthday Party

Well that's it. It's over. I blinked and this year Bubble was too old for a pretty ruffly party (#see disclaimer at bottom). It's ok I'm not bitter I did get 5 years worth of adorable parties out of her.

Party Evolution
6yr Fairy Party, 7yr Mermaid Party, 8yr Princess Party (photo's by Alyce Holzberger),  

Besides, we were never going to have a party this year. We have a big holiday planned so when I booked it in I told the kids firmly 'No parties this year!'

But we all know the parties are really for me, and so I didn't pay any attention to that firm voice. Sadly I also didn't pay enough attention to the passing days.

While I was having my inner debate, would we party or wouldn't we, was I going to cave and pay big bucks for one of those new trampoline-lazer tag superdooper fun places the decision was made. Procrastination was my enemy and my friend 'cause we all know leave it too late and the only time left to book in at one of those party places is early Sunday morning when none of the kids will be able to turn up anyway.


OK decision made do it at home on a budget but the problem was these kids are 10 years old boys and girls. It's a seriously hard crowd to please, I had no idea what to do.

Then while I was shopping I spied a couple of huge bottles of water balloons with 500 balloons in each for $8 and despite the fact it is the middle of winter here another decision was made. We live a few doors down from a park which is pretty quite mostly and it would be a perfect spot for the kids to have their crazy time * see cleaning up note below.

Then the real negotiations started. Bubble was adamant that as there were boys attending the party should not be pink, or pretty or ruffly.

I took a deep breath and decided to go all Disney on her.

Yup I let it go.

We decided to have a make your own ice-cream bar, which was a bit sad for me as no real baking or decorating but good for me too as no real baking and decorating. It was so relaxed in the lead up to the party.


Well pretty much super relaxed until I messaged my SIL about her daughter's birthday party which was about a week and a half away and found out that my niece's party was actually 3 days away and Bubble's party was 10 days away.

Anyhoo it all worked out in the end, Bubble was super happy surrounded by her friends, it was a lovely sunny day warm enough for the water play but cool enough the ice-cream did not melt and everyone seemed to have fun.


Party Food
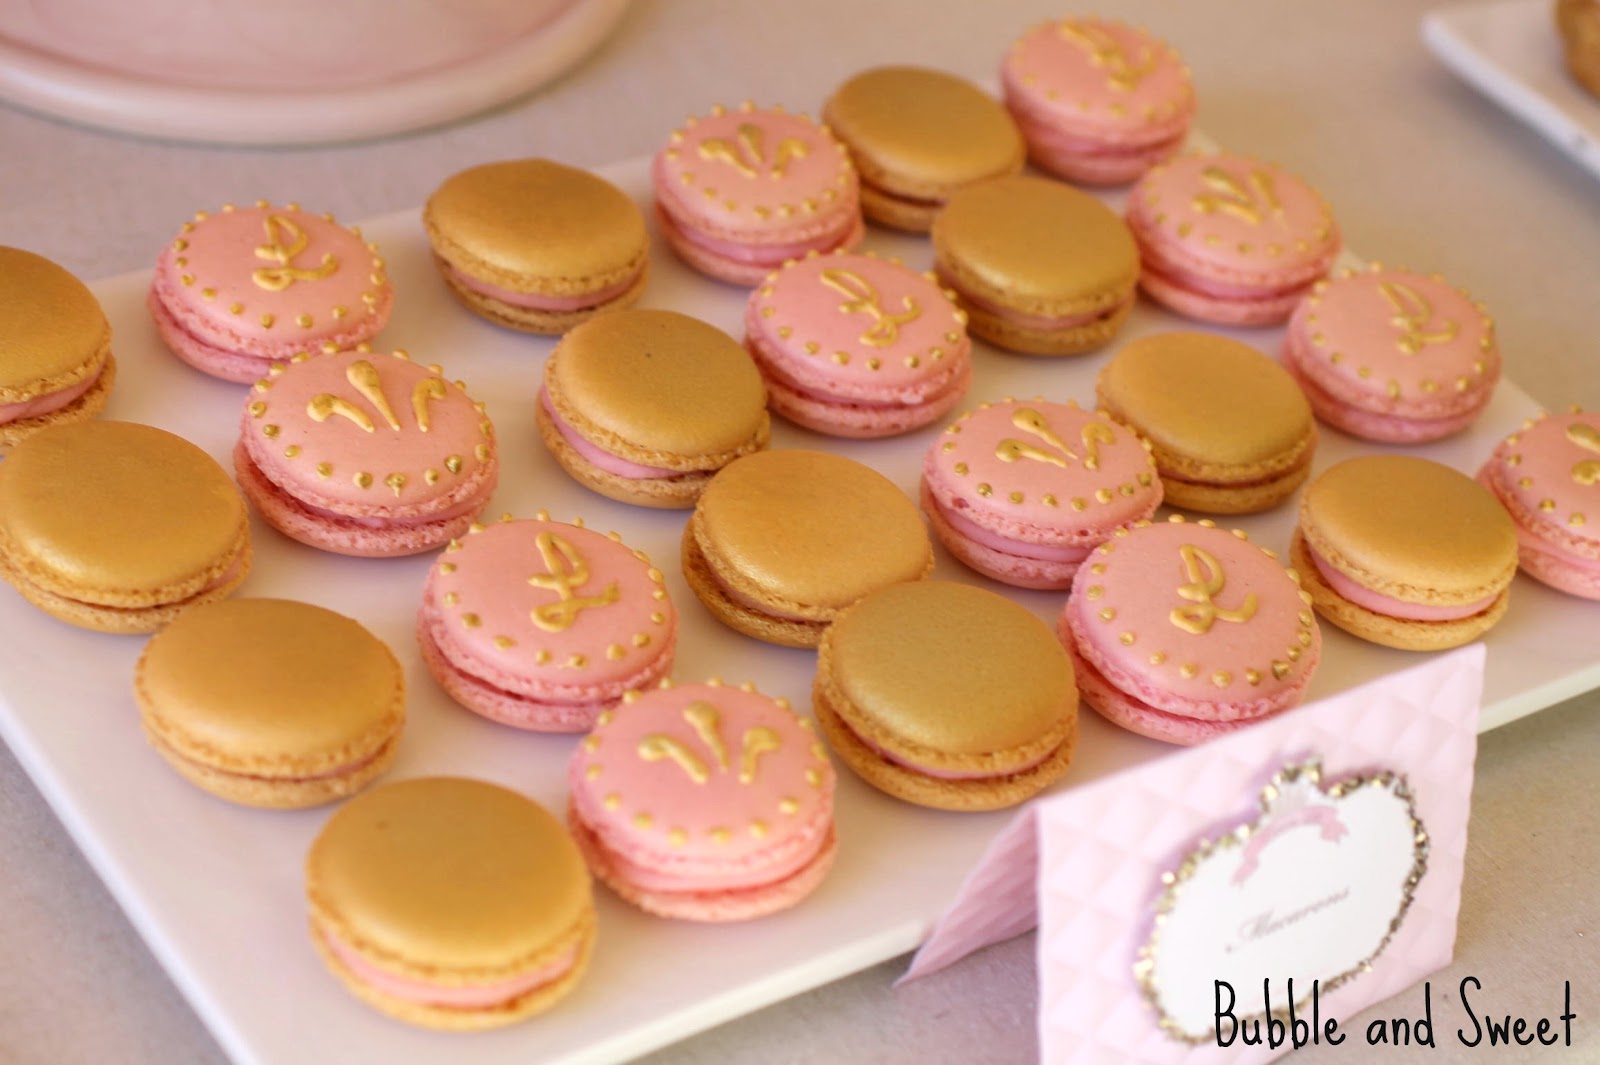
As I said I was pretty relaxed and mostly everything was store bought with the exception of the macarons and chocolate chip cookies (for making ice-cream sandwiches). 

The most popular stuff was the popping candy and the cream filled wafers.


Menu:
Store bought Vanilla and Chocolate Ice-cream
Ice Cream Sundae Macarons (recipe/instructions to follow next week)
Sprinkles
Popping Candy
Chocolate Chip Cookies
Cream filled wafers
Caramel popcorn
Marshmallows
Waffle Cones
Lollipops (take home treat)
Whipped cream in a can
Maraschino Cherries
M and M's
Chocolate, Strawberry and Caramel sauce
Soft drink (Soda)


Party Table Details

Everything on the table was something I already had or borrowed with the exception of a few discount items as detailed below:


Center table/riser - that's my mint green stand covered in red polka dot wrapping paper.
Red and white polkadot buckets for ice-cream from Choice discount/dollar store $2.50 for a set of 3.
Mason jars with straws - from K-mart discount department store for $2 each. I decorated them with washi tape and chalkboard stickers I picked up from another discount/dollar store. I let the kids take these home if they wanted as part of their loot/treat bag.
Glitter Straws - I alternated straws - see how I made the glitter washi tape straws (See post HERE)


Lollipops - $1 each from Kmart. I stuck them in that pink stand I borrowed from my SIL's party and tied with a bit of red ribbon I had sitting around. They were part of the kids take home treats.
 

White dispenser - this is actually a cutlery holder I've had for a while - I picked it up at Mollegaarden HERE. Then I stuck on some of those chalkboard stickers.
Strawberry treat bags - Oh my how cute are these, they are from Paper Glitter CLICK HERE
White Cake Stands - the stands used were existing ones I have had for quite a few years
Chalkboard stands - $3 for a set of 3 from Shmick available at some discount stores or online
Red and white polkadot bowls - Greengate
Gold spoons - Christina Rae
Red baskets, hanging lanterns and gingham placemats borrowed from SIL similar available party or discount stores


Party Games

Photo booth - We started the party off with a homemade photo booth using an instant/Polaroid camera and dress ups we already had. Although it was fun it was a bit less successful than I thought it would be.  Maybe it's more of an end of the party thing, it took everyone forever to pick what they wanted to wear. It was good however to keep the kids occupied while everyone else was turning up.
Make your own Ice-cream bar - I'm calling this an activity as they kids got to make their own sundae or ice-cream soda or ice-cream sandwich or pretty much whatever.The kids enjoyed this, apparently whipped cream in a tin is big with 10 year olds.
Water Balloon tag at the park. Mr Sweet spent about 4 hours filling water balloons. The kids spent about 10 minutes using them all up. But then they kept playing at the park so it was all good.
*Water Balloon clean up. We gave everyone a bag and told them the one with the most used water balloons would win a prize. Yes we really did that, the kids knew it was clean up but they were super good natured about it and we cleaned the park up in no time.
Lunch -  we headed back home and the kids had lunch of sushi and sandwiches.


#disclaimer I make no promises that it is really, really over I am an eternal optimist.

Linda Vandermeer is a blogger, baker, maker and author of the cookbook ' Sweets on a Stick': More than 150 kid friendly recipes for cakes, candies, cookies and pies on the go!. Published in the US the book is available at most online book stores.

Original photography by Linda Vandermeer do not reuse without permission.  Note some of the previous party photographs in this post were taken by other photographers, please do not reuse those photos.

Monday, December 23, 2013

You Tube Video - Cookie dress up dolls

Hi y'all. I have made up a video on how to make the edible clothes for the cookie dress up dolls I posted a bit back so you can see how really, really easy it is.

Like super easy, just as easy as clicking on the picture below.


I'm trying to get out a weekly video, it's my new goal so if you subscribe to my channel up in the kinda top right here on the blog or via youtube you should get updated when new video's come out.

If there is anything I've done in the past which you would like a video please let me know.

I've also made one for my sugar cookies as well (Click picture below for link) where I let the dough set really hard overnight and work it back to a workable consistency.


Those unicorn cookies (Click link below for link). Oh and I'm halfway through putting together the video on the wall mounted unicorn cake as well.


I hope you enjoy my video tutorials, I'm enjoying making them.

Linda Vandermeer is a blogger, baker, maker and author of the cookbook ' Sweets on a Stick': More than 150 kid friendly recipes for cakes, candies, cookies and pies on the go!. Published in the US the book is available at most online book stores.

Original Ideas, photography and recipes by Linda Vandermeer do not reuse without permission.


Sunday, December 15, 2013

Gingerbread people dress up cookie party


This year instead of slaving over a gingerbread house we made gingerbread people dress up cookies. It was fun, easy and I could let the kids eat one (or two) straight away without the stress of breaking up the whole house.

I baked up a big batch of gingerbread men and women (Cookie recipe here).


Then I quickly cut out some fondant clothes using the cookie cutter and the kids got to stick them onto the cookies with royal icing like a dress up toy.

I made sure there were stacks of clothes with different colors and accessories for the kids to choose from. Kids are amazing and see the world differently. I think it might be lovely to see the world with flower eyes :)


Oh my goodness my kids truly love this type of cookie decorating, just love it!

The Destroyer (being a creator), Bubble and I, Sweet and Bubble

Plus perfect for Christmas, well actually my kids want me to say it's perfect for any time ;)

The hardest part of all of this was coming up with a ginger cookie recipe that didn't spread too much (otherwise the fondant clothes would be too small for the cookies). But I spent 2 weeks testing my own recipe so y'all don't have to worry about that, just click on the link in the instructions below.


I made some little mini lollipops and candy canes as well, the kids thought they were super cool.

Note - I have in the past made similar dress up cookies for my daughter's birthday party - but these gingerbread ones are way, way, way easier - trust me. You can check out the original 'paper doll dress up cookie' inspiration HERE:

These are the original dress up doll cookies I made CLICK HERE to see details

Gingerbread people dress up cookies
Make the fondant/sugar clothes as per the instructions below. Once the clothes have set and become hard enough to pick up you can let the kids decorate the cookies by squeezing royal icing onto the cookie and sticking the clothes in place. They can also add gingerbread faces and other decorations as they like.

EDIT update: I've recorded an easy to follow youtube video tutorial here as well:


Gingerbread men and women cookies (Click here for Gingerbread cookie recipe)
Gingerbread men and women cookie cutters
Fondant various colours
Cornflour (cornstarch)
small rolling pin
sharp knife
frilling tool (can use toothpick instead)
Royal Icing (for final assembly)


Line a tray with parchment/ baking paper.

Gingerbread men fondant/sugar clothes
Roll out the fondant onto a workbench dusted with cornflour (cornstarch). Use the gingerbread man cutter to cut out shape and then the sharp knife to cut out the top and shorts (see picture below). If you like you can adhere shapes like a star onto the fondant cut outs. Place cut outs onto the tray lined with paper to dry overnight.


For striped shirt, cut out thin strips of fondant and press onto a contrasting color fondant with the rolling pin, then cut out shapes with cutter as described above. I added a thin strip of vertical fondant on the sleeve edge.

Gingerbread women fondant/ sugar clothes

Roll out the fondant onto a workbench dusted with cornflour (cornstarch). Use the gingerbread woman cutter to cut out shape and then the sharp knife to cut out the top and skirts (see picture below). Place clothes on paper lined tray to dry.


If you like you can make the skirts and edge of the top ruffled by using the frilling tool, press down on the fondant and gently roll back and forth. I also added a thin strip of contrasting color fondant to the sleeve edge of some tops before pressing down with the fondant tool.

You can also cut a second strip to make a 'pettiskirt' underneath, just use the frilling tool to roll back and forth and then stick it underneath the top skirt, you might need to add a small amount of water to adhere the 2 skirts together.

 To make a lace pattern on the edge use the sharp edge of the frilling tool (or a toothpick) to dot holes (see picture below for example).


Accessories

To make a lollipop you will need fondant in 4 different colours and a small length of spaghetti. Roll each colour of fondant into a long thin strip and the twist the fondant together. Starting in the middle wrap the twisted fondant around in a spiral to look like a lollipop. Push the spaghetti into the fondant lollipop disk.
 
The example in this picture only uses 2 colours and is bigger but same concept

 Small flowers pressed out of fondant make great accessories, I used a small ejector cutter.

Linda Vandermeer is a blogger, baker, maker and author of the cookbook ' Sweets on a Stick': More than 150 kid friendly recipes for cakes, candies, cookies and pies on the go!. Published in the US the book is available at most online book stores.

Original Ideas, photography and recipes by Linda Vandermeer do not reuse without permission.


Saturday, June 29, 2013

How to make simple sugar blossoms flowers from fondant


I'm feeling super generous so today I am going to share one of my secret decorating weapons with you, something I turn to when I need a quick fix but don't have a lot of time or money to spare.


Sweet sugar blossoms.

I've done up a quick and easy tutorial showing how simple it is to make up these sugar blossoms from fondant. Once you make them you can use to dress up anything from cupcakes, to cookies, or marshmallows and cakepops.

Yup pretty much anything you like.


There's no big trick to these flowers, just a few tools, a couple of practice runs and you will be on your way to creating a sweet posy of blossoms yourself.

They are so quick and easy to make I usually make more than I need and store them ready to use when I need a little extra something to brighten a treat up.


The step by step photo instructions are below plus I've even made a super fast YouTube tutorial up so you can watch me. Well watch my waist and arms :)


Oh and it would be super neat if you could take the time to follow me on Pintrest, Instagram or Bloglovin.

DIY Simple Sugar Blossoms

Equipment and Ingredients
White Fondant
Pink Fondant
Pink edible petal dust
cornflour (cornstarch)
Small plastic rolling pin
5 petal blossom cutter
Ball tool
dry clean brush
Separate clean bush and wateror edible glue
Non stick pad
flower formers (I use a small artists palette)
 

Dust a workbench with a little cornflour (cornstarch) and knead the fondant until pliable.

Redust the workbench if necessary and roll out the fondant until around 1mm (16") or so in thickness. You may like to lift the fondant and turn a little to ensure it is not sticking.


Using the blossom cutter, press into the thinly rolled fondant to cut out the blossom shapes. Place the cut out shapes on the non stick foam.

Use the ball tool to softly roll around each petal to thin it out and make it a cup shape.


Dust the flower formers with a tiny amount of cornflour (cornstarch) and place the shaped fondant blossoms into them to set/dry.

Once they are dry brush lightly with the petal dust using the clean dry brush. I start in the centre and dust outwards lightly on each petal. Remove any excess dust carefully with a soft bristle brush.


Roll 3 small balls from the pink fondant for each flower and adhere 3 small balls of fondant in the center of each flower with a very small amount of water.


Once dry the flowers can be used immediately or stored for a number of weeks until required. I store mine in airtight containers. Some people like to pop little packets of food safe silica gel in the containers.


The above pictures and post are original works and the property of Linda Vandermeer.

Linda Vandermeer is a blogger, baker, maker and author of the cookbook ' Sweets on a Stick': More than 150 kid friendly recipes for cakes, candies, cookies and pies on the go!. Published in the US the book is available at most online book stores:

Sunday, December 30, 2012

Best of Bubble and Sweet 2012

Thanks everyone for joining me in a fabulous year of baking. I hope you had as much fun reading along as I did creating and sharing my baking journey throughout the year.

I have alot planned for 2013. Remember, you can follow this blog and receive free email updates by entering your details over in the top right hand corner.

For the final post I have compiled a best of Bubble and Sweet.

Best Cakes 2012:

This year ruffles ruled supreme in the big cake stakes. Colorful rainbows and ombre (gradient shades) decorations were just a taste of what was inside with surprising matching or contrasting hues.

Just in time for Halloween and a bit outside of the Bubble and Sweet box was the Monkey Brain cake with jello brain and raspberry sauce. It was gruesomely delicious.
1.How to eat a Tiara Ruffled Princess Cake (photo by Alyce and Colette)
2.Monkey Brain Cake with Jello Brain
3. Pastel Rainbow Ruffle cake
4. Sweet Birdie Ruffle Birdhouse

Other favorite cakes: 

Other favorite cakes included this streamlined ruffle and hand painted aqua wedding cake inspired by a vintage wedding dress with hand painting, a fun candy inspired Christmas cake with gluten free cranberry cake filling, and a fun Ant Picnic cake.
1. A Vintage dress inspired wedding cake
2. Lollipop and candy Christmas tree cake
3. Ant picnic in the park

Best Party Tables 2012:

Fun and fabulous party tables for 2012 included a dreamily pretty shabby chic pink and gold princess party with ruffles and bows, a rustic pie table with a fabulous paper pom backdrop by Ah-Tissue and a sweet as can be bird theme party table.

1. Shabby Chic Princess Party (Photography by Alyce and Colette)
2. Oh Sweet Mum Pie Table (Photography by Naomi V Photography)
3. Sophie's Sweet Birdie Birthday party

Best Cookies 2012:

Quirky ant cookies, a cute scary set of babushka halloween cookies, the sweetest teal, pink and white reindeer cookies and valentine inspired bird cookies were my favorite cookies for 2012.

1. Ant picnic in the park cookies
2. Babushka Munchy Mummy, Evil Ghost and Screaming Ghoul Cookies
3. Sweetest Thing Reindeer Cookies
4. Are You Thinking What I'm Thinking cookies

Best Cheesecakes 2012:

I love cheesecake and hopefully you can share in my love after some of the recipes on the blog this year. Pretty strawberries and cream cheesecake in a jar, photographed in my front garden, delicious mini nutella cheesecakes combining a few of my favorite things and decadent peanut butter and s'mores cheesecakes were among the recipes I shared. I had almost as much fun naming them as eating them. Almost.

1. Strawberry and Cream Cheesecakes in a Jar
2. These are a few of my favorite things Nutella Cheesecakes
3. Totally tastes better than thin - Smores cheesecake
4. If this is wrong I don't want to be right Chocolate Peanut Butter mini Cheesecake

Best Sweets on a Stick 2012 (includes best cake pops 2012)

Sweets on a Stick - it's the name of my book and something I think I do pretty well here at Bubble and Sweet. Macarons in divine hues decorated like lollipops and on top of cake pops were a couple of my favorites. A planter box of cake pops and cookies made using the instructions from my book in pastel hues for a party table was loved by all.

1. Lollipop Macarons
2.Macaron cake pops
3.Cute bird cake pops, flower cookies and cloud in the sky cookies (recipes from Sweets on a Stick)

4.Pot of gold at the end of the rainbow cakepops

Best small cakes 2012 (Includes Best Cupcakes 2012):

Did I go overboard with the mini macarons? - I don't think so. Who could resist the delicious chocolate hazelnut cakes topped with raspberries and mini gold macs or piped butter cream rose topped strawberry cake with delicate pink mini mac? Spiced pear cupcakes were a hit for those looking for something simple. High maintenance decorators preferred high heel shoe cupcakes.

1. Chocolate Hazelnut cakes with French Buttercream (Gluten Free)
2. High heel Shoe cupcakes - high maintenance decorating
3. Pink rose and macaron shabby chic petit fours
4. Spiced pear cupcakes with caramel cream cheese frosting

Best treats 2012 (misc)

Easy to make army of ghost Oreo truffles was the surprise hit of the year being the second most popular post on the whole blog. More mini macs topped other delicious treats including the fun mini pumpkin chiffon pies with pecan pie bites and the milk chocolate mousse pies (which would have to be one of my favorite pictures ever - thank you Naomi V Photography). Peppermint cookie fudge proved to be a fast, easy and delicious treat to share.
1. Army of Ghosts Oreo Truffles
2.Chocolate Cream Mousse Pie (sorry no recipe provided) (Photo by Naomi V Photography)
3. Pumpkin Chiffon Pies  (photo by Naomi V Photography)
4. Peppermint Cookie Fudge

Favorite new product 2012

My favorite new find during 2012 would have to be the edible jelly gems. I mostly used them in cookies but found that with not much work they could dress up anything turning simple marshmallows into a treat fit for a princess.

1. Elegant Ornament Cookies
2. Jewelled Marshmallows
3. How to eat a Tiara   (Photography by Alyce and Colette)
 4. Princess Cookies


Other highlights:

Cake pop and cookie demonstrations at the Bleeding Heart Cafe in Brisbane proved to be even more fun than I thought they would be. The best part was meeting people who read my blog on a regular basis. Another class is being planned for April 2013.

Recipes I created were included in Tickle the Imagination magazine, online and print version, and Peekaboo magazine. Many online newspapers and magazines linked back to my popular posts, and of course many blogger friends linked back to Bubble and Sweet as well.

The absolute best bit

...and the best part of 2012 from a Bubble and Sweet perspective was all the fabulous interaction on the blog, on instagram, on pintrest and on facebook. Truly I still get excited when I receive lovely feedback - it's what keeps me going.

Thank you everyone again for reading the blog and sharing my baking journey.

You helped make my year one of the best yet :)


....................

Unless stated otherwise recipes, photos and posts by Linda Vandermeer author of Sweets on a Stick: More than 150 Kid Friendly recipes for cakes, candies, cookies and pies on the go. You can pick it up at all good online book shops including these shops:


Or here at fishpond (Aus/NZ)

Sweets on a Stick: More Than 150 Kid-Friendly Recipes for Cakes, Candies, Cookies, and Pies on the Go!


Sunday, August 5, 2012

Pink Shabby Chic Princess Party for Lilli's 8th Birthday


Lilli just had her 8th birthday party and she decided on a sweet princess party with a color scheme of pink, gold and white.

Sweet, Bubble and Charlie.....Photo by Alyce Holzberger

EDIT UPDATE: Here is a link to the princess dress Bubble is wearing and a couple of others they have:


I am pretty sure our recent trip to Disneyland and the number of people telling her she looked like Cinderella had no part whatsoever to play in her decision :)

Candy jars from 2 Garnish

Regardless of the reasoning I was more than happy to oblige. I've mentioned before that my tastes run towards pastel and pretty and Princess is totally a theme within my comfort zone.

The party had a bit of a shabby chic feel and a touch of glittery glitz to reflect Lilli's sweet, fun and vibrant personalty.

photograph by Alyce Holzberger

I was lucky enough to be able to borrow the ruffled tablecloth from my SIL. It is linen with a white ruffle layer in the middle and was a great background for the pink white and gold food.

photograph by Alyce Holzberger

I modified it with some pink muslin fabric and a scattering of handmade shabby chic fabric flowers.


We used the same flowers in pink frames behind the table to add a bit of texture and interest on the plain white walls. The same effect could be achieved with paper poms.


I hung a handful of paper pom poms in light pink, tan and white from Ah-Tissue to continue the ruffle theme.

photograph by Alyce Holzberger

Of course we did have to have a princess themed cake and I decided to make a ruffle cake (which we still love at the moment in this household). The tiara is totally edible made from fondant, edible jelly jewels and painted with gold lustre dust. More photo's of the cake and what I used to make the tiara can be found in my previous blog post CLICK HERE.

Royal sugar cookies with edible jelly jewels, gold luster dust and ruffles

Royal cookies were an assortment of cookies in gold, pink and white that were a little bit more mature than the cookies we generally make for the kids parties. My little girl is growing up and the treats while still fun are more reflective of her tastes. They are fondant covered sugar cookies (recipe from Sweets on a Stick) decorated with rolled fondant, royal icing (recipe from Sweets on a Stick) and edible jelly jewels. The white cookies with the jewel and gold royal icing piping were her favorite. Mine were the ruffled cookies.


To keep in with the pink and gold royal theme I made the macarons in pink and gold with hand piped and painted decorations on the pink batch.


Princess delights were round choux pastry puffs with raspberry pastry cream, fondant and raspberries.


To dress up a packet of simple marshmallows I popped them on a stick, dipped them in pink chocolate/ candy coating, added a jelly jewel, piped a 'royal' decoration which was painted with gold edible paint.


Candy consisted of 4 different flavors of bon bons and twisted rope marshmallow cut into shorter pieces.


I picked up the princess printables from Polkadot Prints (who are one of my favorite designers with a fun blog as well) and did a bit of glittering.

photograph by Alyce Holzberger

Cardboard cake boxes are from Robert Gorden, I picked them up at 2 garnish, they come flat pack with double sided tape already in place. Seriously I was so behind in my preparations the Friday before the party I took them along to the kids swimming classes and put them together in the viewing areas. I was folding and sticking those boxes in between waving at the kids and giving them thumbs up signs through the glass barrier.


We like to have the parties at our house and this year the timing was not great as we are having some minor renovations. The painters packed up at about 2pm on the Friday ready to return bright and early Monday morning which did not leave a lot of time for me to bake and decorate for the event.

photograph by Alyce Holzberger

Knowing this in advance, I arranged for an entertainer to come and manage the kids which took some of the pressure off as I had no need to think up party games, or buy prizes and I could focus on what I love which is the food.

Tiara by Terri Vandermeer photograph by Alyce Holzberger

I booked in Super Steph - and she truly was super.


The kids adored her magic show, they were totally enthralled, and as a result the mums and dads adored not having to worry about looking after the kids at all.


We also had a princess pit stop with dress ups, tiaras, and jewels, which was actually just the kids Ikea  storage unit repurposed with a bit of 'satin' from the craft store.

Fabric tiara by Terri Vandermeer

I made up the ruffled party bags myself CLICK HERE for a tutorial on how to DIY.

photo by Alyce Holzeberger

It was all worth it.....after the party Lilli gave me a big hug and said 'Thank you for my Party I loved it".

photo by Alyce Holzeberger

Cakes, macarons, cookies, marshmallows, choux puffs by  Bubble and Sweet
Photography Alyce Holzberg Photography
Entertainer (magic, balloons, party games) Super Steph
Printables PolkaDot Prints
Paper Pom Poms Ah Tissue
Pink Ceramic Cake Stand Clara French
Cake boxes and candy jars from 2 Garnish
Edible Jelly Jewels from Culpitt purchased at Party Animal
Fabric Shabby Chic Flowers  Karen McCubbin

photo by Alyce Holzeberger

Special thanks to Terri Vandermeer for her styling assistance and help Xx


Here are some pictures of the kids enjoying themselves at the party. Thanks everyone for sharing Lilli's special day.


Headwear by Karen McCubbin


EDIT UPDATE I found some similar kids dress up racks here over at Amazon as quite a few people have asked about them:


Above photo's by Alyce Holzeberger


Linda Vandermeer is a blogger, baker, maker and author of the cookbook ' Sweets on a Stick': More than 150 kid friendly recipes for cakes, candies, cookies and pies on the go!. Published in the US the book is available at most online book stores:


Or here at fishpond (Aus/NZ)

Sweets on a Stick: More Than 150 Kid-Friendly Recipes for Cakes, Candies, Cookies, and Pies on the Go!