Showing posts with label baking. Show all posts

Wednesday, November 27, 2024

Chocolate Basque Baked Cheesecake Recipe

Growing up I lived about 50 metres down the road from a cheesecake shop (although not THAT cheesecake shop) and they would sell half cheesecakes which my mum would sometimes get us as a treat. My favourite was the baked cheesecake topped with a layer of jelly/jello set with blueberries. Oh how I loved those cheesecakes.

Actually now that I am telling you about it, I am thinking I should try and recreate it. But this story is not about my childhood cheesecake it is about chocolate Basque baked cheesecake.

About a year ago we found a dessert restaurant a few suburbs over that makes on site delicious gelato and Basque cheesecakes.  They use good quality ingredients, which I am sure of as I am a little bit of a food stalker and I peer into their stock room and check out what they use. 

But alas for me (although happily for them) they seem to be very busy and every time we go now they are devastatingly out of my favourite chocolate Basque cheesecake.

Luckily baking is what I do so I decided to make my own and now I have cheesecake when ever I want and my only problem is that I eat way too much cheesecake. As a solution I have been making smaller cakes and the recipe below is for a 6" cake which is a lovely size if you have just a few people to serve. 

(note the cheesecake in these pictures is only 4" 
because I am trying to eat less cheesecake)

Basque cheesecake differs from regular baked cheesecake as it is has no biscuit base and is cooked at a high temperature which results in a dark top and creamy centre. It is important to cool the cheesecake for enough time for the middle to set, at least 4 hours for this recipe but preferably overnight.

Happy Baking

xx

Linda 

Chocolate Basque Cheesecake - makes a 6" cheesecake which will make 6-8 snack serves. I like to serve mine with cherries which is a lovely contrast to the velvety chocolate cheesecake. I use a good quality chocolate like Callebaut. Cheesecake slices can frozen wrapped individually in plastic wrap and thawed in the fridge.

450g (16oz) cream cheese at room temperature

200g (7 oz) dark chocolate melted

100g (3 1/2 oz) caster/ superfine sugar (use regular granulated sugar if that's all you have)

10g (4 tablespoons) cocoa sifted

3 eggs room temperature

1 tsp vanilla

225g (8oz) thickened cream (dollop cream) (heavy cream)

good pinch salt

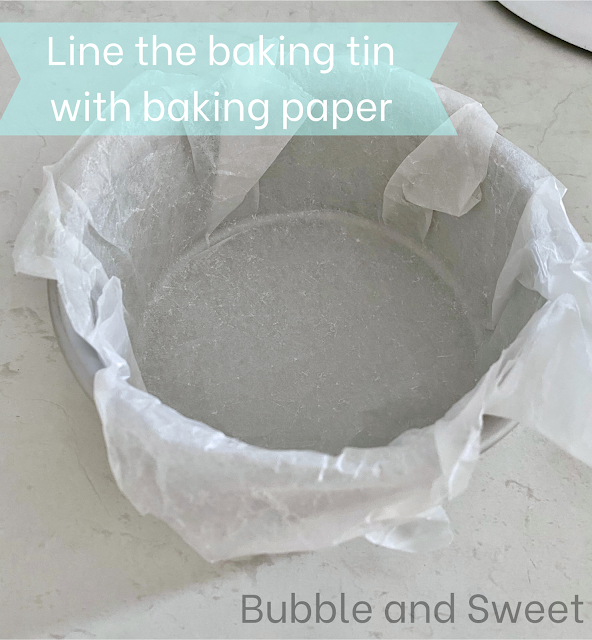
Line a 6 inch wide by 3 inch high, round baking tin with baking paper. To do this crumple up the paper in your hands and then place over the baking tin and press down I used a spoon to press a line around the bottom rim and then turn the edges over the top rim.

Place cooking rack into middle of oven and preheat to 220 C Fan forced (430F).

Melt the chocolate in a microwave safe dish. I melted mine for 2 mins at 60%, stirred and then another 2 mins. Alternatively if you only have high setting heat for 20sec intervals stirring between each burst and being careful not to overheat. Set aside until needed.

Sift together the caster sugar and cocoa to ensure there are no lumps.

Make sure the cream cheese is at room temperature so the mixture will be silky smooth. Place into mixer bowl and mix at low speed until smooth and creamy. You do not want any lumps at this stage and also we are not trying to incorporate extra air or volume. The room temperature ingredients and slow mixing are key steps.

Scrap down the sides of the bowl add the caster sugar and cocoa and mix at slow speed. Add the eggs one at a time and vanilla and mix until well. Continue to scrap down the sides of the bowl until the mixture is completely combined and smooth.

Add the melted dark chocolate and fold in with a spatula, there should be no lumps and no streaks when you are finished.

Add the thickened cream and salt and mix well.

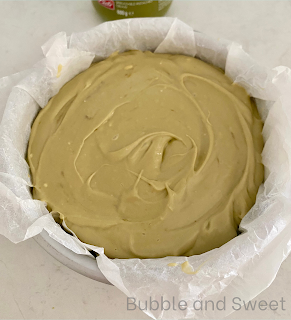
Pour mixture into the prepared tin and bake for 25 mins, increase temperature to 230C (450F) and cook for a further 5 mins. 

Turn oven off and allow to cool in oven with door ajar for 15mins. 

Put cheesecake into fridge for at lease 4 hours or overnight.

Prior to serving remove from tin and allow to sit at room temperature for 20 mins. If your cheesecake is stuck and you can't get it to release, it's just some of the fats set hard. Run a plastic spatula around the edge between the paper and tin and if it still won't come out pop the base into hot water for a second being careful not to splash the cake and it should easily slide out.


Saturday, November 16, 2024

Ring of Roses Strawberry Layer Cake


It's just been our birthday time of the year when we are lucky enough to celebrate a birthday every month, and no matter what ever else happens in life or how old we are, Birthday Cake is always a must.

Bubble's birthday is the first off the rank and she chose strawberry cake which has been a family favourite since as long as I can remember. It is a pretty pink cake flavoured and coloured using jelly crystals (jell-o box) which makes for a consistent cake all year round. My family recipe has had a few tweaks over the years so I've included the current recipe below.

The birthday girl decreed only a small amount of frosting. I decorated simply by covering with Italian Meringue buttercream (recipe below), adding some texture with varying shades of contrasting buttercream and edible gold and added a ring of big sweeping rose swirls on top using a 1M tip alternating between pink and white and then with random piped leaves. The pink colour is sugar flair dusky pink/wine and the green is sugar flair eucalyptus. Italian Meringue buttercream uses whipped egg whites and a sugar syrup and takes a bit more work than simple American buttercream. I like to use it as it is lighter and less sweet to my taste. 


To give the cake a bit of a lift I added pistachio cream between each layer, which to be honest, although nice was not really worth the effort (**keep your eyes out for a pistachio ganache recipe I have coming up which will be worth the wait). The pistachio cream was from Costco but seriously you can just leave it out and the cake will be just as lovely.


If you want to see another version of this strawberry cake decorated in a different way check out this sweet strawberry candy girl cake here on my blog. 

xx

Linda  

Pretty rose swirl strawberry cake - makes a 6 inch 3 layer cake

- 3 x 6" strawberry cakes (see recipe below)

- 1 x batch Italian Meringue buttercream (see recipe below)

- 1 cup Pistachio cream (optional) warmed in microwave just for a short time until it easily is spreadable but not hot.

Assembly Instructions

You can make this cake 2 or 3 days before you serve. Bake the cake, cool and wrap in plastic wrap. I trim the brown edges off this cake but you don't need to, I do it because I like the look of the sliced cake. You will however need to trim off any domed top to make 3 cakes approximately the same height.

-Place the bottom layer onto a 6"cake board (or straight onto a plate or stand if you are not using the cake board). 

-Pop a small dollop of buttercream under the cake to secure it in place and then using an offset spatula spread a layer of buttercream over the top. 

-Put some buttercream into a piping bag wth a large round tip and pipe a dam around the edge of the cake (see picture below). Spoon in half the pistachio cream and pop into fridge to chill until buttercream is firm. 

- Remove from fridge and top with a thin layer of buttercream to seal the pistachio cream. Add the next layer and repeat the above steps of spreading a layer of buttercream, piping a dam,  adding the pistachio cream and placing in fridge to chill again.

- Remove from fridge, top with a thin layer of buttercream to seal the pistachio cream, add the final cake layer and cover with a thin crumb coat, smoothing the sides and top. Place into fridge to chill until buttercream is firm to touch.

- Reserve around 1 1/2 cups plain white buttercream and colour the remainder in pink.

- smooth the pink buttercream over the cake in a thin layer, if you can't get it perfect do not stress, this cake has an imperfect textured look to it. If you have a cake turntable and a cake scraper it is easier to achieve a smooth finish, but if not use a knife or offset spatula to the best of your ability. I have been known to use a clean plastic ruler in a pinch. 

- Put the remaining pink and the white buttercream into seperate piping bags with a 1M tip and pipe the roses. If you look at my cake closely you will notice that there are only 3 pink swirls and 5 white swirls, with some pink stars piped in-between. The key here is to do what you want, it's your cake be creative. I also piped a border around the bottom with a small star tip. Then I coloured a small amount of the remaining white buttercream green (eucalypt) and piped the leaves. Pop into fridge to chill until firm.

I wanted a rustic casual look and added some of the left over buttercream to the sides randomly and smoothed it in with an offset spatula. Finally after another quick chill I added some edible gold leaf.


Sweet Strawberry Layer Cake (divide the batter into 3 x 6" pans to make a 4" high filled cake)
The jelly (jello) used in this recipe is the dry sugar crystals in the packet. If cake flour is not available use 310g (11 oz) plain (all purpose) flour and add 40g (1 3/8 oz)of cornflour (corn starch) instead.
*Note I like to use weight instead of cup measurements as standard cup sizes are not the same in USA and Australia.

350g (12 3/8oz) cake flour
2 1/2 tsp baking powder
200g (7oz) sugar
1 packet strawberry jelly crystals (jell-o) 85g (3oz approx)
225g (8 oz) unsalted butter at room temperature
4 large eggs at room temperature
1 tsp vanilla extract
240ml (8 1/2oz) full fat milk
135g (4 3/4oz) no fat greek yogurt 

Preheat oven to 170 C  (340 F) fan forced. Line the base and sides of 3 x 15cm (6") tins or 2 x 20cm 8" tins.

Sift the flour and baking powder and set aside until needed.

In the bowl of a large mixer at high speed cream together the butter, sugar and jelly (jello) crystals until light and fluffy.

Reduce speed to low and add the vanilla and then eggs one at a time mixing until combined and scraping down the sides as required.

Add 1/3rd of the flour mixture, mix at low speed until just combined scraping down sides as required. Add 1/2 the milk and mix until combined and then another 1/3rd of the flour mixture once again mixing and scraping down the sides.

Add the remaining milk and all of the yogurt and mix until combined and then the final third of flour making sure the sides and bottom of bowl have been scraped down and no lumps of flour are remaining.

Divide the mixture evenly between the prepared tins.

Bake until the cake is cooked all the way through and a skewer inserted comes out dry approximately 45 minutes.


Italian Meringue Butter cream This batch will make enough to fill and cover the cake and extra to decorate with buttercream flowers as in the example.

Make sure your bowl and mixer are clean to whip egg whites. I use a stand mixer with a pouring shield to make this butter cream, the sugar syrup is very hot, make sure you take appropriate safety precautions when pouring the hot sugar syrup mixture. Not suitable for young children to make.

300g white sugar (12oz)
75g (2 3/4oz) water
5 egg whites
450g (1 pound - 4 sticks) unsalted butter cut into smallish cubes
1 tsp vanilla extract

Place sugar and water into saucepan over high heat and bring to boil. Conintue to  heat until the sugar syrup mixture reaches 115 C (240F). Brush down the the sides of saucepan with a wet pastry brush as required to stop sugar crystals from forming.

Place the egg whites in the bowl of your mixer (make sure the bowl is quite large). When the sugar syrup reaches 110C (210F) start to whip the egg whites at high speed.

Once the sugar syrup reaches 115C (240 F) carefully pour the syrup into the whipped egg whites whilst the mixer is still beating on high.

Continue to beat until the egg and sugar mixture cooled to room temperature (or the bowl feels cool to touch) and then start to add a few cubes of butter at a time. Add the vanilla.

The mixture may become quite liquid, but continue to beat until it thickens and all the butter is evenly distributed. If necessary pop the mixing bowl into the fridge to cool down a little then continue to mix.


I love when people share my blog ideas and give credit. All posts contain original ideas, photography and recipes by Linda McCubbin unless otherwise credited. Please feel free to link back to my blog for non commercial purposes.

Monday, October 24, 2022

Raspberry Heart Linzer cookies


One of the things about owning a cafe was I rarely found enough time to blog or develop new recipes. Once customers found something they liked, I would be churning out the same cookies day after day. I can't call it a problem though as these Linzer cookies were always super popular and often sold out.

The cookies are lovely, buttery but still manage to be light with a hint of vanilla and cinnamon and once filled are not overly sweet and the perfect treat to have with afternoon coffee or tea. 

At the cafe they were filled with raspberry jam or lemon curd (raspberry was the biggest seller) and at Christmas we would change the heart cut out to a mini Christmas tree.

The cookie recipe calls for Almond Meal which is simply ground almonds. I actually often buy my almond meal from Costco and find it to be of good quality, I prefer the one with the skins removed but if you can only find ground almond still with their skin on the recipe would still work.


If you like you can freeze the dough in smaller batches before baking if you like, although I did scale my recipe back for you to make a smaller batch than I normally would.

The cookies can be stored for a few days, but I find them best if stored without the jam filling and then filled not long before you plan on eating them.

*I usually pop the unused egg whites into a ziplock bag in the freezer to use later to make meringue or macarons.

The dough is quite buttery so make sure you use the kitchen bench and rolling pin well with flour. I use an offset metal spatula to lift the cookies onto my baking tray.


I hope you enjoy these as much as my family and friends do.

xx

Linda

Linzer Cookie Recipe makes 16-18 double cookies filled with jam (7cm or 2 3/4")

170g unsalted butter (6oz) 1 1/2 sticks

100g caster sugar (3 1/2 oz)

1tsp vanilla extract

1/2 tsp ground cinnamon 

1 egg yolk

160g plain flour (5 5/8 oz)

75g ground almond meal (2 5/8 oz)

pinch salt

To finish

around 1/2 cup raspberry jam 

icing sugar (powdered sugar) for dusting 

Mix butter, sugar, vanilla and cinnamon on low until combined with an electric mixer (I use a stand mixer) then increase speed to high and cream until light and fluffy.

reduce speed of mixer to medium low and mix in egg yolk until combined. Scrap down the sides with a spatula as needed.

At low speed mix in the flour, almond meal and salt and mix until combined.

Put some plastic wrap on the counter, tip the cookie dough onto the plastic, wrap securely and pop in the refrigerator until it's firm enough to work with. 


Dust counter and rolling pin with flour, cut away 1/4 of the dough and roll out until 1/4 inch thick. Cut out circles and place on baking tray. 

Try cutters like this from Amazon (link to product)

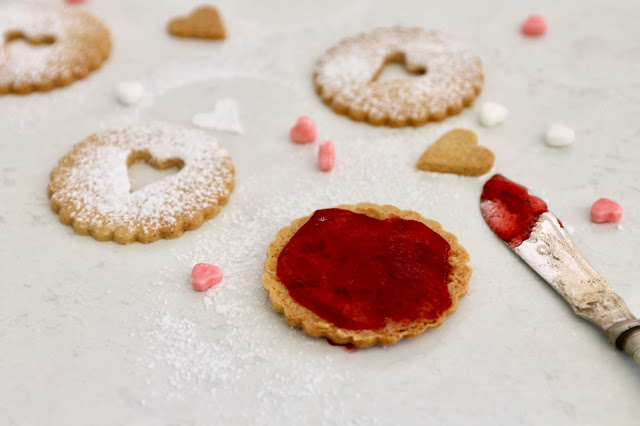
On half of the circles cut out/remove a smaller heart shape in the centre as per the picture.

Bake at 160 C for 12-15 mins or until just turning golden. Allow to cool on trays.

Split the cooked and cooled cookies into 2 lots, the whole round cookies and the cookies with hearts cut out. Using a sieve, dust icing sugar (powdered sugar) onto the heart cut out cookies.


Place the whole circle cookies so the bottoms are facing up (the side that was on the bottom during cooking). Heat the jam in the microwave and then spoon 1/2 to 1 tsp jam on each round cookie and spread almost to the edge with a knife or spatula. Press the sugar dusted heart cookie on top of the jam.

Store in an airtight container for up to 3 days.


Monday, October 17, 2022

Walnut caramel coffee slice, new beginnings and learning to breathe

Wow what happened there, I took a little break to run a cafe, blinked and there went 6 years. For real that just flew by.

Note to self, live every moment. I know you all learnt this a few years ago when COVID happened and everything shut down. But that's not what happened to me. Because I owned a cafe in Australia so I got up every single day put on a mask and went to work to keep that cafe running, do the admin, pay the staff so that hopefully there was still a cafe at the end of it all.

And then after 2 years came the end of restrictions, which was soul destroying because there was no way for the me to keep the cafe going.

Anyhoo I learnt a long time ago that endings are really just beginnings and I'm grateful for all the lessons I learnt, skills I gained and all the wonderful friends I made.

So I'm taking a little bit of time at the moment to focus on my health and my family. I'm working in a low stress job, focusing on some yoga training and learning to breath again.

And I'm blogging, because it's something I've always loved. But whoa everything's changed (but me) and it's taking me a little while to learn how to do everything.

So......like I said I owned a cafe in the suburb where I grew up. It was pretty old school and the people that came there were the sweetest bunch of people. It used to feel like inviting my friends over to my breakfast table, it wasn't fancy and everyone knew everyone else.

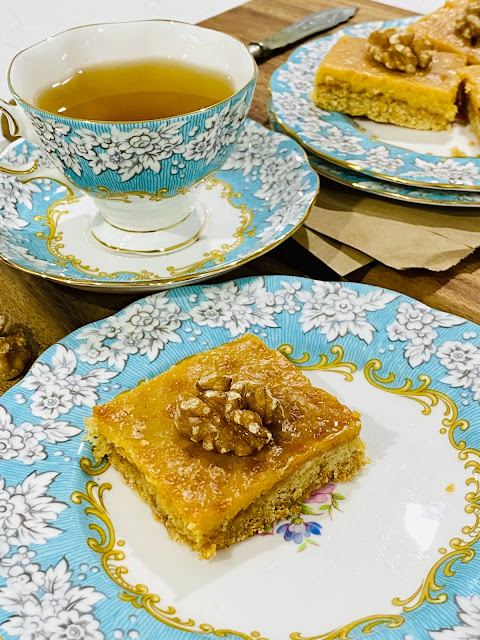
This is one of the cafe OG recipes, a simple old fashioned condensed milk 'caramel' slice. The staff used to bake this on site in the oven. We served it topped it with some walnuts but it's just as lovely plain if you prefer or drizzled with a little chocolate.

It's almost the opposite to the current crazes of fancy big cookie recipes out at the moment, it's so simple, you can eat a piece and still fit in your lunch. Plus it's perfect to freeze and you can slice it up after baking, freeze individual slices and pull out a piece to have for your afternoon tea or pop in your lunch bag.

xx Linda

Walnut Caramel Slice (makes 12 pieces)

Base

1 cup self raising flour

1 cup desiccate coconut

1/2 cup brown sugar

125g melted unsalted butter (4 oz)

Caramel Layer

1 tin condensed milk

2 Tbsp golden syrup (US 2 TBSP plus 2 Tsp)

25g unsalted butter (7/8 oz)

Topping

1 cup chopped walnuts *I used 12 halves, you can substitute with pecans or drizzled chocolate


- grease (I lightly spray oil) and line a shallow rectangle baking tin (mine was27.5cm X 17.5cm X 3.5cm or 11" X 7" X 1.5 ") with baking paper and preheat oven to 180 C (355 F).

This is a link to the pan I used on Amazon

- pop the flour, coconut, brown sugar and melted butter into a bowl and mix together well to combine.

- press the mixture down evenly into the prepared baking tin.

- place in middle of preheated oven and bake for 10 - 12 mins until it's golden brown.

- remove from oven and while it's cooling make the caramel (don't turn the oven off you still need it). *note if you don't let the base layer cool a little bit at this stage the condensed milk caramel layer will sink into it and not spread as well.

Make the caramel layer 

- place condensed milk, golden syrup and butter into a microwave safe dish and microwave on high for 1 minute, mix well. 

-Continue to microwave for 30 second bursts until a light golden colour and the mixture has thickened a little like the picture below. Don't go too far it's still got to cook for a little bit in the oven. Usually a total of 2 mins (thats 4 X 30 second bursts).


Spread the mixture evenly over the bottom of the cooked and slightly cooled base and bake for a further 10 -12 minutes the edges will bubble and start to turn brown. See picture of the finished slices to see what it should look like.

Remove from oven, if you are topping with walnuts gently sprinkle onto the top ensuring you do not touch the hot caramel

Allow to cool for a few hours until the caramel is set (you can place in the fridge for a few hours to speed the process up)

Cut into 12 pieces (4 along the long side and 3 on the short). Keep in an airtight container for up to 5 days in the fridge. 

This slice can be frozen whole wrapped in plastic and placed in an airtight container for 1 month. Or sliced and wrapped into individual pieces in an airtight container. Just take out what you need from the freezer and allow to defrost in the fridge.


Sunday, July 24, 2016

White Chocolate and Caramel Brownie Recipe

White Chocolate and Caramel Brownies - recipe below

I'm back home living with my parents whilst my new house undergoes some renovations.

So when I received a box of goodies from Nestle to join in the #Bakeityours challenge instead of reaching for the chocolate like I normally would I decided to make something with white chocolate and add in one of my dad's favourite lollies Jersey Caramels to come up with a treat he would appreciate.


The resulting brownies were dense and a little chewy which I liked and quite sweet. I think they improved after a day losing some of the initial sweetness and impving in texture.

Anyway onto the reason Nestle sent out the box of goodies is to let y'all know they have a new Nestle Bakers' Choice range. I like the suggestions on the front of the packets that say things like 'for coating and decorating' or 'for adding and pouring' and found the white chocolate to be quite a nice creamy texture which melted quite easily.


White Chocolate and Caramel Brownies
(makes 12 store in air tight container in fridge for up to 3 days) Wilton 195 piping tip used for decorating.

150 g ( 5 1/4 oz) butter
200 g ( 7 oz) white chocolate
3 eggs lightly beaten
1 tsp vanilla extract
1 cup lightly packed brown sugar
1 2/3 cup plain flour
220 g (7 3/4 oz) Jersey Caramels chopped
Whipped jersey caramel topping (see below)
6 Jersey Caramels cut into half extra for decorating

Line a rectangle slice tray approx 18cm x 28cm ( 7" x 11") with baking paper

Preheat oven to 180 C (350 F)

Melt butter and white chocolate in a microwave safe dish for 2 minutes on medium low heat. Mix (the mixture will not be soft yet) and then heat for another 2 minutes at medium low heat. Whisk until no lumps remain.

Add eggs and vanilla and whisk until just combined.

Fold through the flour and then the jersey caramels and spread the mixture into the prepared tray.

Bake for 30 minutes until the brownie is golden and cooked through in the middle.

Cut into triangles and pipe a dollop of whipped ganache into the middle of each brownie and top with half a jersey caramel.

Jersey Caramel whipped ganache topping

5 jersey caramels
1/2 tsp water
100 g (3 1/2 oz) white choc
25 g (7/8oz) cream

Melt the jersey caramels and water for 60 seconds at low rest and stir and then heat for another 60 seconds in the microwave and mix until smooth.

Melt the white chocolate and cream together at medium low heat 2 minutes and mix until smooth. Add in the melted caramel mixture and allow to cool to room temperature.

Whip with an electric mixer until light and fluffy.


Linda Vandermeer is a blogger, baker, mother, owner of The Biscuit Cafe and author of the children's cookbook Sweets on a Stick: More Than 150 Kid-Friendly Recipes for Cakes, Candies, Cookies, and Pies on the Go! Published in the US in 2011 the book is still available online at Amazon and other online book stores.

Affiliate links may earn me money and contribute to supporting this blog

I love when people share my blog ideas and give credit. All posts contain original ideas, photography* and recipes by Linda Vandermeer-McCubbin unless otherwise credited. Please feel free to link back to my blog for non commercial purposes.

I was sent a box of nestle product to assist in the development of recipes for this blog post. No sponsorship or financial incentive was received.


Saturday, December 5, 2015

It's an amazing day to bake, laugh and live


I haven't been posting very much lately as I've been spending all my time with the children over the past few months as we go through the process of a marital separation.

Life goes on, we are doing well considering the situation and focusing on a the amazing aspects of our life.

I have been baking but mostly comfort food: cookies, cinnamon rolls, banana raspberry muffins, making and decorating cupcakes with the kids.

I have plans to make macarons this week, some gingerbread cookies and maybe a Christmas cake, although you might remember in the past I am more for the anti-fruit cake variety.


These are images I took for the latest issue of 'Tickle the Imagination' magazine where I share 10 fabulous reasons to bake up some fun with your kids.

Kids wear aprons by Greengate similar available Simply Sweet Home

I also share a recipe for a healthier donut to make with the kids which is baked in a donut pan instead of fried and has a banana muffin base. It's a great alternative to all those super sized treats that are around at the moment.


Tickle the Imagination magazine is available online here and at selected newsagents and outlets.


Linda Vandermeer is a blogger, baker, maker and author of the Children's cookbook Sweets on a Stick: More Than 150 Kid-Friendly Recipes for Cakes, Candies, Cookies, and Pies on the Go! Published in the USA in 2011 the book is still available at Amazon and many online bookstores.

Affiliate links may earn me money and contribute to supporting this blog.

Original ideas, photography and recipes Linda Vandermeer please do not reuse without permission except for non commercial purposes where you may use 1 image, give credit and link back to original post.


Monday, March 30, 2015

Chocolate Hot Cross Bun Recipe


I love baking, love it. But for some reason when it comes to hot cross buns I usually buy them from the bakery or supermarket.

But this weekend we had a bit of free time so I whipped up some myself taking an old traditional hot cross bun recipe and modifying to add chocolate chips, removing all that unnecessary dried fruit and changing the bun into a chocolate bread with a lightly fragrant cinnamon base.

Deliciously perfect just baked Chocolate Hot Cross Buns

I don't know why it took me so long, look at that picture, delicious just baked softly fragrant buns and oh my goodness the house smells even better than those buns look.

Plus it cost me way less than the bakery ones, so economical as well.

They were super easy as I used my stand mixer's dough hook attachment and saved about 10 minutes time of hand kneading, although don't worry, the recipe will work out just fine hand kneading if you don't have a dough hook/stand mixer.


I find the key things for successful baking with yeast is to not overheat and to prove the yeast prior to mixing into the other ingredients. Oh and time, you can't really rush it, I made the ones in the picture in about 2 1/2 hours including rising and baking time but I would normally set aside at least 3 hours.

Chocolate Hot Cross Bun Recipe makes 12 large hot cross buns
I use premix royal icing mixed with water to a piping consistency.

2 X 7g packets yeast 14g total (1/2 oz total)
1 tsp caster sugar
3/4 cup milk (6 fl oz)
50 g unsalted butter (1 3/4oz) melted/softened
1 large egg
1/2 cup milk (4 fl oz) extra
525 g plain (18 1/2 oz all purpose flour)
70 g caster sugar (2 1/2 oz)
25 g cocoa (7/8 oz)
2 tsp ground cinnamon
1/4 tsp salt
230 grams chocolate chips (8 oz)  # the baking kind that hold shape.
1/2 cup royal icing mixed with  1/2 tsp cocoa and 1/4 tsp cinnamon.

Put milk in microwave safe jug and heat in microwave for around 15- 20 seconds at high so that it is warm to touch (not hot). Using a fork whisk in yeast and 1 tsp sugar and allow to sit around 10 mins until needed.

The yeast should froth up like this

Sift the flour, cocoa, remaining caster sugar, cinnamon and salt together and set aside until required.

In the bowl a large stand mixer with a scraper beater attachment or regular beater, place the butter, egg and 1/2 cup milk and mix for 30 seconds at low speed. Add the yeast mixture and mix another 10 seconds, then add the sifted flour mixture and beat at low speed until all the dry mixture has been incorporated. The mix will be quite sticky.

Switch to a dough hook and mix at medium low speed for a couple of minutes until the mixture is smooth and elastic.* If you do not have a stand mix and dough hook you can knead by hand for around 10 minutes.

Spray a large bowl with oil, place the dough into the bowl, cover with plastic wrap and pop in a warm place to rest for around 1 to 1 1/2 hours until the mixture has doubled in size. I use my oven and turn it up to 50C for a few minutes then turn it off before placing the bowl into the oven, if required I turn the oven light on. It should be just warm not hot.

Once the dough has risen remove from bowl, punch it down and mix in the chocolate chips quickly. I used baking chips which do not melt very quickly, the higher quality chocolate will melt and become a sticky mess.

Dough should be smooth and flexible

Lightly spray a baking tray around 20cm X 30 cm with oil. Shape the dough into 12 even rolls and place into the tray. Cover with plastic wrap and allow to rest/rise for 30 minutes.

Heat the oven to 190 C (fan forced). Remove the plastic wrap from baking tray and pop the buns in the oven for 10 minutes, reduce the heat to 160 C and cook for a further 20 minutes.

Allow to cool a little. Pop the royal icing into a zip lock bag, cut a small hole in the corner and pipe crossed onto the top of the buns.

Best served immediately although still good next day. Store in airtight container at room temperature.


Linda Vandermeer is a blogger, baker, maker and author of the cookbook ' Sweets on a Stick': More than 150 kid friendly recipes for cakes, candies, cookies and pies on the go!. Published in the US the book is available at most online book stores.

Affiliate links may earn me money and contribute to supporting this blog.

Original Ideas, photography and recipes by Linda Vandermeer do not reuse without permission. 

Cute dress from Target Australia

Monday, December 22, 2014

Sweet Deer Cookies with silver leaf


I've been making super cute gingerbread deer cookies today.

Really I had planned to do this 2 months ago, so yes I'm just a little behind. I had this great idea for cupcakes with white chocolate Christmas tree shards and silver leaf and matching little deer cookies.

Then I went to make them and Oh My Goodness my deer cookie cutter was missing.

Greengate from Simply Sweet Home

It's kinda the sweetest little cookie and I just didn't want to make them without THAT cutter and I originally got it from Cakes by Bien but I wanted it quick so I had it sent from Cakers Bits and Bobs who are here in Australian and ship pretty fast so I got it within a day.

But then I realised I didn't order my silver leaf because, well because I was being cheap when I did the last online order and it can be a bit expensive. I was going to just pick up a little jar locally I figured it would work ok but then Oh My Goodness it was like $17 for a teensy weensy tiny jar so I decided to just order a whole book of transfer* sheets from Baking Pleasures which will last for cookies or sweets for ever (well not really but I don't use that much).

Then I kinda lost momentum.

But it's Christmas in a few days so I am baking like crazy and finally made them.


I tried them just white with silver leaf which was lovely and elegant, then with a little eye drawn on with edible marker, still adorable. Then I added a pink fondant nose and little pink ears which was super adorable.


Then I made some plain with the decorations and they worked out so well. I think gingerbread is the perfect colour just naturally with the spices for these little deer cookies and in fact the cutter is so sweet that the minimal decorating looked super dooper cute.


I guess the secret to these cookies is having a good gingerbread cookie recipe that will not spread out of shape so I've included my recipe below :)

Silver Leaf Elegant Deer Cookies
*I have used edible silver leaf on transfer sheet - not loose leaf which kinda flies all around the place for me. You can use the loose leaf if it works for you.

Deer cookies (see gingerbread recipe below)
White roll out fondant
Small plastic rolling pin
Deer cutter
Cornflour (or cornstarch)
Water and 2 clean brushes (used only for food)
Edible silver leaf transfer* sheet (I got mine at Baking Pleasures in Australia)
Optional - black edible marker


Knead white fondant until pliable, dust workbench with a little cornflour and roll out the fondant until quite thin. Cut out deer shape, brush water onto the cookie and then gently press the fondant onto the cookie.

Using a clean brush dab a teeny amount of water on the back area of the cookie. You just want the cookie to be slightly damp so wipe the brush on a paper towel to make sure it is barely wet.

Press the silver leaf transfer with the silver leaf facing down towards the cookie and rub your finger (or a cake tool) randomly on bits of the cookie. Pull the transfer off and allow the cookie to dry.

If you like you can add a small eye with the edible marker as shown in the picture.


Best Gingerbread Cookie Recipe
*Make sure that the spices you use are fresh as possible if you want your cookies to be aromatic and tasty. Conversions to imperial are approx.
I made these with both white sugar as per the recipe below and treacle (molasses, golden syrup, dark corn syrup) - the same weight and the recipe turned out well. I found it kept it's shape better with the white sugar which was important to me for what I was doing. The treacle gave a light fragrant undertone to the cookie and it had a more tender crumb, just putting the option out there for you. 

455g plain flour (1 pound all purpose flour)
2 tsp ground ginger 
2 tsp ground cinnamon
1/4 tsp ground allspice (or ground cloves if you prefer) 
1/4 tsp baking powder
1/4 tsp salt
1 Tbsp unsweetened cocoa(US 1Tbsp + 1 tsp)
230g unsalted butter (8 1/8 oz) softened (not too soft
70g dark brown sugar (2 1/2oz)
70g white sugar 
1 egg

Sift together flour, ginger, cinnamon, allspice, baking powder, salt and cocoa and set aside until required.

In the bowl of an electric mixer cream together the butter, brown and white sugar at high speed for 3 minutes. Reduce speed to medium low, add the egg and mix until combined.

Reduce speed to low and mix in flour mixture until the dough clumps together and is well combined.

Wrap the dough in plastic wrap and place in the fridge until firm.

Once dough is firm remove from fridge and roll out on a workbench dusted with a little plain (all purpose) flour. You may need to knead the dough a little to make it pliable.

Cut out shapes and place on a baking tray lined with baking paper.

Place trays of unbaked cookies into fridge for 30 minutes. Preheat oven to 160C (320F)

Bake for 8 to 12 minutes (depending on cookie size) remove from oven and allow to cool on trays for 5 minutes. Remove from trays carefully and place onto wire racks to cool completely. 

Greengate Summer White - It's what I'll be using for my Australian Christmas Setting

Linda Vandermeer is a blogger, baker, maker and author of the cookbook Sweets on a Stick: More Than 150 Kid-Friendly Recipes for Cakes, Candies, Cookies, and Pies on the Go! . Published in the US the book is available at most online book stores. 

This post is not sponsored by any of the companies mentioned and I purchased all the products myself however I am related to the owner of Simply Sweet Home

Amazon affiliate links may earn me money and contribute to supporting this blog.

Original Ideas, photography and recipes by Linda Vandermeer do not reuse without permission.