Sunday, November 20, 2011

It's OUT - Sweets on a Stick available to buy I think

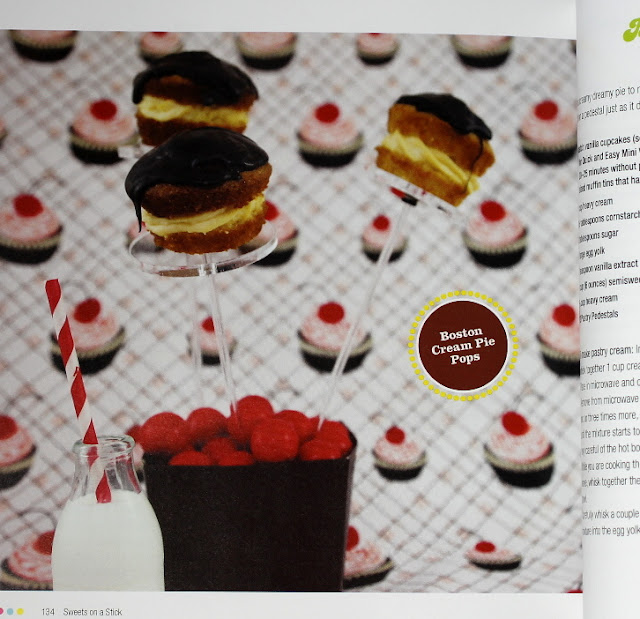
       Boston Cream Pie Pops page 135

It's out!!!!

People have told me they have received copies they pre ordered of my book Sweets on a Stick, so although some online shops are saying not released yet I'm gonna have to consider my book sorta-released.

Safari Mask Cookie page 104

It's very exciting to see the actual book. It was a lot of work for me and also for my family and friends who put up with me for many months while I was testing, writing, retesting and rewriting recipes and instructions for the book.

Cowboy Hat Cookie Pops page 94

I was thinking about writing a post about how the book actually came about so if you are interested let me know, for today I'll just do a short interview with myself:

 Dino Stomp Cookies page 83

Favorite part of writing Sweets on a Stick:

Creating the recipes and ideas

Least favorite part of creating Sweets on a Stick:

writing 150+ introductions to the recipes, yes now my total dorkiness is out there in print for perpetuity for all to see.

Favorite recipe

Oh yay this is so not like having kids - I totally had a favorite, the monster cake pops where I came up with a new technique to make the open mouth.

 Big Mouth Monster Pops page 28
Favorite perk

Getting to thank my mum and dad and other people who have inspired and helped me in actual print. Really come to think of it I should thank everyone I love more often.

Special thanks to everyone who helped me during the development of this book especially Andrea at Adams Media without you the book would not exist.

Sticky Cinnamon Roll Sticks page 118

and thank you, yes YOU for reading my blog, because without your readership, comments and encouragement none of this would exist.


Coconut Ice Cake Pops page 20

Anyway and I always feel like some annoying infomercial when I do this but here are a couple of places online you can pick up my book. If your in the US it should be arriving in books stores soon.

Amazon have it of course:


Or the book depository UK (Click HERE)

Or here at fishpond (Aus/NZ)

Sweets on a Stick: More Than 150 Kid-Friendly Recipes for Cakes, Candies, Cookies, and Pies on the Go!

Sweets on a Stick is a kid friendly recipe book. The cakes and other treat recipes have been created with kids in mind so they are mostly easy mix and all the treats are on a stick. However they are suitable for all ages and can be made without sticks if you choose.

The photos in the book were taken by Terri Vandermeer, the above dark and off center photos were taken by me with my new camera that I can't work and have lost the instructions for.

Friday, November 18, 2011

Penguin nesting doll Christmas Cookies


In Australia it's pretty much the middle of summer in Christmas. I live not far from the Gold Coast (popular touristy beach) and growing up Christmas parties consisted of swimming, BBQ's ,seafood platters and pavlova's. I'm pretty sure I mentioned it last year when I made up some 'prawn' Christmas cake pop (as a joke, not for real).

As you no doubt have noticed the Christmas decorations have been out for a while and more than once I have overheard fellow shoppers while picking up glittery cupcakes and highheel shoe ornaments asking their friends kinda loudly what on earth do THESE have to do with Christmas.

Everytime I smile to myself thinking well kinda as much as the snowflakes and holly leaves do in our weather......

But regardless I have the same weird belief that all things snowy stand for Christmas and for the second cookie off the rank for my Christmas swap cookies I'm going with a penguin with a scarf and beanie once again made using my good ole' babushka cookie cutter set.


I mentioned it before but people always ask so here in Australian I got my nesting doll cookie cutters from Bisk-art HERE

In the US I have noticed them at Fancy Flours and Ecrandal have a super pretty copper 5 set.

The cookie recipe I used is from my newly released book Sweets on a Stick available here at Amazon, the book also has a recipe for Marshmallow Fondant.


Or the book depository UK (Click HERE)

Or here at fishpond (Aus/NZ)

Sweets on a Stick: More Than 150 Kid-Friendly Recipes for Cakes, Candies, Cookies, and Pies on the Go!

Or you can find similar recipes for vanilla sugar cookies, chocolate sugar cookies and marshmallow fondant on my blog by using the search function :)

and don't y'all go worrying your pretty little heads, I AM going to do the nutcraker cookie tutorial, I'm just workin' my way up to it.
Penguin nesting doll cookies
These instructions use the medium nesting cookie cutter, follow the exact same instructions for small or large nesting doll cutter.

Sugar cookies made using medium nesting doll cookie cutter
black rolled fondant shop bought or home made marshmallow fondant (I used shop bought chocolate flavored fondant colored with black americolor gel)*
colored rolled fondant any colors (or home made marshmallow fondant)*
small amount of orange rolled fondant (or home made marshmallow fondant)*
black edible writing pen
small round cutter (around 2cm or 3/4 inch)
oval cutter (around 4.5cm or 1 3/4inch in length)
small 6 petal flower cutters (13mm or 1/2 inch)
small rolling pin
medium nesting doll cookie cutter (around 9.5cm or 3 3/4 inch)
small sharp knife

clean brush and water

*Fondant dries out very quickly. Use small amounts work quickly and when not in use place the fondant in an airtight container or ziplock bag to minimise the chances of it drying out and cracking.

Roll out the black fondant onto a clean benchtop dusted with cornflour/ cornstarch, or you can rub on some crisco or spray a little oil (this method is good if you have trouble with the white flour showing up as dots). Roll out until a couple of mm (1/8") in thickness. I like to lift my fondant frequently and turn it like pie dough to ensure it does now stick to the bench while rolling it out.


Use the nesting doll cookie cutter to cut out a shape. Lightly brush a cookie with water and place the fondant over the cookie, using the rolling pin lightly press down to adhere the fondant to the cookie.


Roll out some white fondant and  cut out a small round face and an oval tummy, attach them to the black fondant coloured cookie, the smaller round in the face area and the larger oval in the tummy area.

Ooops used the wrong oval cutter in this picture it should be quite a bit bigger than the circle

Roll out a small amount of the colored fondant on a cornflour/ cornstach dusted workbench until a couple of mm (1/8") in thickness and using the nesting doll cutter cut out the head, then using the side of the nesting doll cutter where it curves at the shoulder section press down about .5cm from the top of the head to make a little beanie/ hat. You can make the hat bigger or larger as you like. Adhere the hat to the penguin cookie with a small amount of water ensuring the rounded edge of the beanie is in line with the top of the penguin 'head' and the bottom of the beanie will overlap the white round face.Press down lightly on the beanie with the rolling pin as needed to secure.


Still using the curved side of the rolling pin, press in down lightly about 1mm from the bottom curved edge of the hat to make a small decorative indent. Using the knife work your way along the beanie rim you have just made making small indents about 1mm apart. If you like you can use the square corner edge of the cookie cutter to make more decorative indents in the hat to look like knitting. Roll a small ball of white fondant and adhere it to the top of the hat to look like a little pom pom.


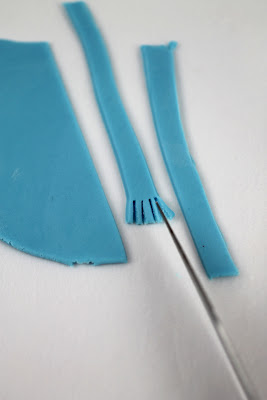
Make the scarf by rolling out some more of the fondant and using the sharp knife cut out 2 strips around .5cm wide and 3-4cm long. At one end using the sharp knife to cut a fringe around .5cm long with about 4 to 5 pieces as per the picture.


Using a small amount of water adhere the scarf pieces around the neck of the penguin.and cut any overhang at the neck off using the sharp knife.


Shape a small nose using the orange fondant and adhere with the pointed end pointing down to the middle of the face with a very small amount of water.

Roll out some more of the orange fondant and cut out a couple of small flowers using a 6 petal fondant cutter.

Using the sharp knife cut them in half to make little feet. Adhere 2 feet with the flat edges parallel with the bottom of the cookie with a small amount of water.


Allow the fondant on the snowman to dry a couple of hours and then using the edible pen draw on 2 eyes.
 

Tip Junkie handmade projects

Sunday, November 13, 2011

Snowman nesting doll Christmas cookies


One of my favorite cookies ever is the babushka doll (nesting doll) which I first posted on this blog about a year ago here and then an even prettier version earlier this year HERE. After I posted tutorial instructions one of my lovely readers Jody emailed me a picture of a set of Santa nesting dolls suggesting they would make a great set of cookies to which I totally agreed and ever since I have had it in the back of my mind to do just that.

So when I was thinking of ideas for the Christmas Cookie swap I was part of,  Santa nesting doll cookies was one of the first things I thought of. But I needed to make a set and so this snowman was the second thing that popped into my head.

Snowman cookies are nothing new, but this version with the nesting doll cookies is cool as you can easily make a family, and once I post the instructions for a couple of the other cookies in the set you can make quite a few Christmas themed cookies using the one basic shape.

Plus anything that uses nesting doll cookie cutters is just really neat!

If you don't have a set of nesting doll cookie cutters, you could follow these instructions and use a regular ole' snowman cookie cutter and they would look just as cute. Well almost.


Over here in Australian I got my nesting doll cookie cutters from Bisk-art HERE

In the US I have noticed them at Fancy Flours and Ecrandal have a super pretty copper 5 set.

Snowman nesting doll cookies
These instructions use the medium nesting cookie cutter, follow the exact same instructions for small or large nesting doll cutter.

Sugar cookies made using medium nesting doll cookie cutter
white rolled fondant shop bought or home made marshmallow fondant
colored rolled fondant any colors (or home made marshmallow fondant)
small amount of orange rolled fondant (or home made marshmallow fondant)
black edible writing pen
small rolling pin
nesting doll cookie cutters
small sharp knife

clean brush and water

Roll out the white fondant onto a clean benchtop dusted with cornflour/ cornstarch. until a couple of mm (1/8") in thickness. I like to lift my fondant frequently and turn it like pie dough to ensure it does now stick to the bench while rolling it out.


Use the nesting doll cookie cutter to cut out a shape. Lightly brush a cookie with water and place the fondant over the cookie, using the rolling pin lightly press down to adhere the fondant to the cookie.


Repeat with remaining cookies.

Roll out a small amount of the colored fondant on a cornflour/ cornstach dusted workbench until a couple of mm (1/8") in thickness and using the nesting doll cutter cut out the head, then using the side of the nesting doll cutter where it curves at the shoulder section press down about .5cm from the top of the head to make a little beanie/ hat. You can make the hat bigger or larger as you like. Adhere the hat to the snowman cookie as shown in the picture using a very small amount of water and pressing down lightly with the rolling pin as needed.


Still using the curved side of the rolling pin, press in down lightly about 1mm from the bottom curved edge of the hat to make a small decorative indent. If you like you can use the square corner edge of the cookie cutter to make more decorative indents in the hat to look like knitting. If you like you can roll a small ball of white fondant and adhere it to the top of the hat to look like a little pom pom.


Repeat for remaining cookies.

Make the scarf by rolling out some more of the fondant and using the sharp knife cut out 2 strips around .5cm wide and 3-4cm long. At one end using the sharp knife to cut a fringe around .5cm long with about 4 to 5 pieces as per the picture.

Using a small amount of water adhere the scarf pieces around the neck of the snowman.and cut any overhang at the neck off using the sharp knife.


Shape a small nose using the orange fondant and adhere to the middle of the face with a very small amount of water.


Allow the fondant on the snowman to dry a couple of hours and then using the edible pen draw on 2 eyes and 5 dots for the mouth. I find starting with the center dot and working my way out makes for a more even smile.
 
Now for some great news (well for me anyway) it seems some of the online book shop warehouses have started receiving my book and have emailed people on the waiting lists to say the book is on its way soon. I had a few copies delivered during the week and I'm so happy with how it turned out. Remember it's a US release book and the weights and measurements are written accordingly although there is a conversion chart in the back of the book. It's available lots of places, here is a link to Amazon: