Showing posts sorted by date for query dress up cookies. Sort by relevance Show all posts

Sunday, December 30, 2012

Best of Bubble and Sweet 2012

Thanks everyone for joining me in a fabulous year of baking. I hope you had as much fun reading along as I did creating and sharing my baking journey throughout the year.

I have alot planned for 2013. Remember, you can follow this blog and receive free email updates by entering your details over in the top right hand corner.

For the final post I have compiled a best of Bubble and Sweet.

Best Cakes 2012:

This year ruffles ruled supreme in the big cake stakes. Colorful rainbows and ombre (gradient shades) decorations were just a taste of what was inside with surprising matching or contrasting hues.

Just in time for Halloween and a bit outside of the Bubble and Sweet box was the Monkey Brain cake with jello brain and raspberry sauce. It was gruesomely delicious.
1.How to eat a Tiara Ruffled Princess Cake (photo by Alyce and Colette)
2.Monkey Brain Cake with Jello Brain
3. Pastel Rainbow Ruffle cake
4. Sweet Birdie Ruffle Birdhouse

Other favorite cakes: 

Other favorite cakes included this streamlined ruffle and hand painted aqua wedding cake inspired by a vintage wedding dress with hand painting, a fun candy inspired Christmas cake with gluten free cranberry cake filling, and a fun Ant Picnic cake.
1. A Vintage dress inspired wedding cake
2. Lollipop and candy Christmas tree cake
3. Ant picnic in the park

Best Party Tables 2012:

Fun and fabulous party tables for 2012 included a dreamily pretty shabby chic pink and gold princess party with ruffles and bows, a rustic pie table with a fabulous paper pom backdrop by Ah-Tissue and a sweet as can be bird theme party table.

1. Shabby Chic Princess Party (Photography by Alyce and Colette)
2. Oh Sweet Mum Pie Table (Photography by Naomi V Photography)
3. Sophie's Sweet Birdie Birthday party

Best Cookies 2012:

Quirky ant cookies, a cute scary set of babushka halloween cookies, the sweetest teal, pink and white reindeer cookies and valentine inspired bird cookies were my favorite cookies for 2012.

1. Ant picnic in the park cookies
2. Babushka Munchy Mummy, Evil Ghost and Screaming Ghoul Cookies
3. Sweetest Thing Reindeer Cookies
4. Are You Thinking What I'm Thinking cookies

Best Cheesecakes 2012:

I love cheesecake and hopefully you can share in my love after some of the recipes on the blog this year. Pretty strawberries and cream cheesecake in a jar, photographed in my front garden, delicious mini nutella cheesecakes combining a few of my favorite things and decadent peanut butter and s'mores cheesecakes were among the recipes I shared. I had almost as much fun naming them as eating them. Almost.

1. Strawberry and Cream Cheesecakes in a Jar
2. These are a few of my favorite things Nutella Cheesecakes
3. Totally tastes better than thin - Smores cheesecake
4. If this is wrong I don't want to be right Chocolate Peanut Butter mini Cheesecake

Best Sweets on a Stick 2012 (includes best cake pops 2012)

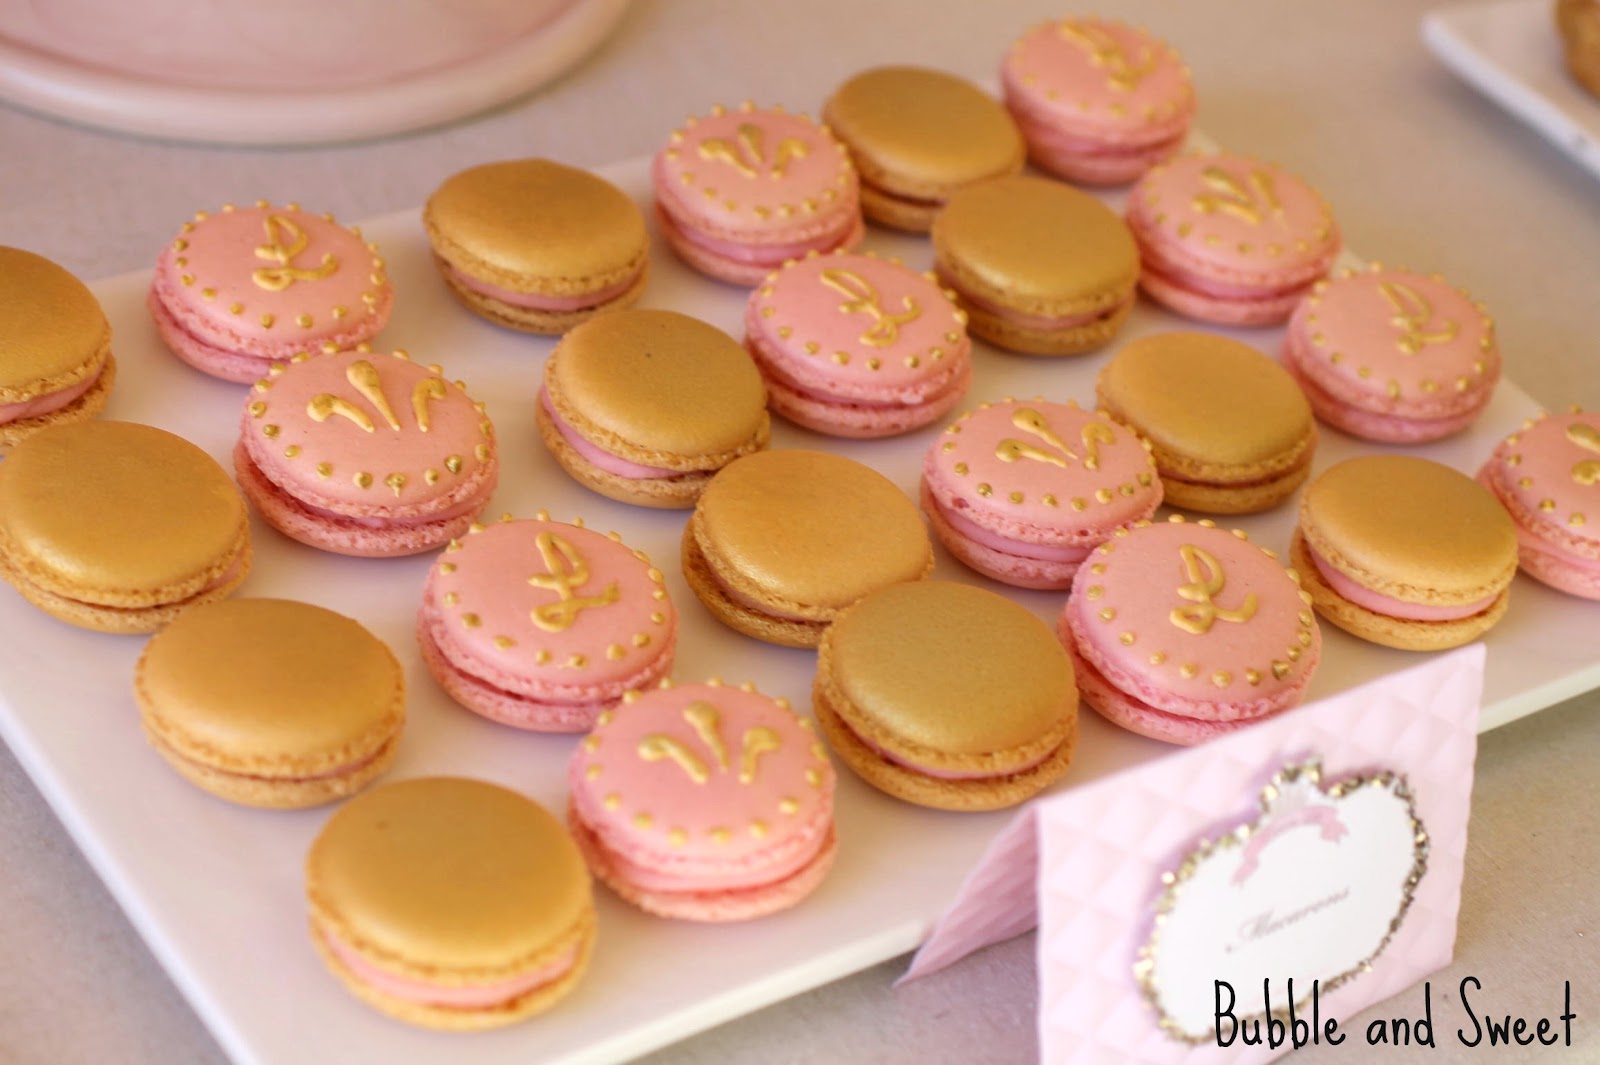
Sweets on a Stick - it's the name of my book and something I think I do pretty well here at Bubble and Sweet. Macarons in divine hues decorated like lollipops and on top of cake pops were a couple of my favorites. A planter box of cake pops and cookies made using the instructions from my book in pastel hues for a party table was loved by all.

1. Lollipop Macarons
2.Macaron cake pops
3.Cute bird cake pops, flower cookies and cloud in the sky cookies (recipes from Sweets on a Stick)

4.Pot of gold at the end of the rainbow cakepops

Best small cakes 2012 (Includes Best Cupcakes 2012):

Did I go overboard with the mini macarons? - I don't think so. Who could resist the delicious chocolate hazelnut cakes topped with raspberries and mini gold macs or piped butter cream rose topped strawberry cake with delicate pink mini mac? Spiced pear cupcakes were a hit for those looking for something simple. High maintenance decorators preferred high heel shoe cupcakes.

1. Chocolate Hazelnut cakes with French Buttercream (Gluten Free)
2. High heel Shoe cupcakes - high maintenance decorating
3. Pink rose and macaron shabby chic petit fours
4. Spiced pear cupcakes with caramel cream cheese frosting

Best treats 2012 (misc)

Easy to make army of ghost Oreo truffles was the surprise hit of the year being the second most popular post on the whole blog. More mini macs topped other delicious treats including the fun mini pumpkin chiffon pies with pecan pie bites and the milk chocolate mousse pies (which would have to be one of my favorite pictures ever - thank you Naomi V Photography). Peppermint cookie fudge proved to be a fast, easy and delicious treat to share.
1. Army of Ghosts Oreo Truffles
2.Chocolate Cream Mousse Pie (sorry no recipe provided) (Photo by Naomi V Photography)
3. Pumpkin Chiffon Pies  (photo by Naomi V Photography)
4. Peppermint Cookie Fudge

Favorite new product 2012

My favorite new find during 2012 would have to be the edible jelly gems. I mostly used them in cookies but found that with not much work they could dress up anything turning simple marshmallows into a treat fit for a princess.

1. Elegant Ornament Cookies
2. Jewelled Marshmallows
3. How to eat a Tiara   (Photography by Alyce and Colette)
 4. Princess Cookies


Other highlights:

Cake pop and cookie demonstrations at the Bleeding Heart Cafe in Brisbane proved to be even more fun than I thought they would be. The best part was meeting people who read my blog on a regular basis. Another class is being planned for April 2013.

Recipes I created were included in Tickle the Imagination magazine, online and print version, and Peekaboo magazine. Many online newspapers and magazines linked back to my popular posts, and of course many blogger friends linked back to Bubble and Sweet as well.

The absolute best bit

...and the best part of 2012 from a Bubble and Sweet perspective was all the fabulous interaction on the blog, on instagram, on pintrest and on facebook. Truly I still get excited when I receive lovely feedback - it's what keeps me going.

Thank you everyone again for reading the blog and sharing my baking journey.

You helped make my year one of the best yet :)


....................

Unless stated otherwise recipes, photos and posts by Linda Vandermeer author of Sweets on a Stick: More than 150 Kid Friendly recipes for cakes, candies, cookies and pies on the go. You can pick it up at all good online book shops including these shops:


Or here at fishpond (Aus/NZ)

Sweets on a Stick: More Than 150 Kid-Friendly Recipes for Cakes, Candies, Cookies, and Pies on the Go!


Sunday, August 5, 2012

Pink Shabby Chic Princess Party for Lilli's 8th Birthday


Lilli just had her 8th birthday party and she decided on a sweet princess party with a color scheme of pink, gold and white.

Sweet, Bubble and Charlie.....Photo by Alyce Holzberger

EDIT UPDATE: Here is a link to the princess dress Bubble is wearing and a couple of others they have:


I am pretty sure our recent trip to Disneyland and the number of people telling her she looked like Cinderella had no part whatsoever to play in her decision :)

Candy jars from 2 Garnish

Regardless of the reasoning I was more than happy to oblige. I've mentioned before that my tastes run towards pastel and pretty and Princess is totally a theme within my comfort zone.

The party had a bit of a shabby chic feel and a touch of glittery glitz to reflect Lilli's sweet, fun and vibrant personalty.

photograph by Alyce Holzberger

I was lucky enough to be able to borrow the ruffled tablecloth from my SIL. It is linen with a white ruffle layer in the middle and was a great background for the pink white and gold food.

photograph by Alyce Holzberger

I modified it with some pink muslin fabric and a scattering of handmade shabby chic fabric flowers.


We used the same flowers in pink frames behind the table to add a bit of texture and interest on the plain white walls. The same effect could be achieved with paper poms.


I hung a handful of paper pom poms in light pink, tan and white from Ah-Tissue to continue the ruffle theme.

photograph by Alyce Holzberger

Of course we did have to have a princess themed cake and I decided to make a ruffle cake (which we still love at the moment in this household). The tiara is totally edible made from fondant, edible jelly jewels and painted with gold lustre dust. More photo's of the cake and what I used to make the tiara can be found in my previous blog post CLICK HERE.

Royal sugar cookies with edible jelly jewels, gold luster dust and ruffles

Royal cookies were an assortment of cookies in gold, pink and white that were a little bit more mature than the cookies we generally make for the kids parties. My little girl is growing up and the treats while still fun are more reflective of her tastes. They are fondant covered sugar cookies (recipe from Sweets on a Stick) decorated with rolled fondant, royal icing (recipe from Sweets on a Stick) and edible jelly jewels. The white cookies with the jewel and gold royal icing piping were her favorite. Mine were the ruffled cookies.


To keep in with the pink and gold royal theme I made the macarons in pink and gold with hand piped and painted decorations on the pink batch.


Princess delights were round choux pastry puffs with raspberry pastry cream, fondant and raspberries.


To dress up a packet of simple marshmallows I popped them on a stick, dipped them in pink chocolate/ candy coating, added a jelly jewel, piped a 'royal' decoration which was painted with gold edible paint.


Candy consisted of 4 different flavors of bon bons and twisted rope marshmallow cut into shorter pieces.


I picked up the princess printables from Polkadot Prints (who are one of my favorite designers with a fun blog as well) and did a bit of glittering.

photograph by Alyce Holzberger

Cardboard cake boxes are from Robert Gorden, I picked them up at 2 garnish, they come flat pack with double sided tape already in place. Seriously I was so behind in my preparations the Friday before the party I took them along to the kids swimming classes and put them together in the viewing areas. I was folding and sticking those boxes in between waving at the kids and giving them thumbs up signs through the glass barrier.


We like to have the parties at our house and this year the timing was not great as we are having some minor renovations. The painters packed up at about 2pm on the Friday ready to return bright and early Monday morning which did not leave a lot of time for me to bake and decorate for the event.

photograph by Alyce Holzberger

Knowing this in advance, I arranged for an entertainer to come and manage the kids which took some of the pressure off as I had no need to think up party games, or buy prizes and I could focus on what I love which is the food.

Tiara by Terri Vandermeer photograph by Alyce Holzberger

I booked in Super Steph - and she truly was super.


The kids adored her magic show, they were totally enthralled, and as a result the mums and dads adored not having to worry about looking after the kids at all.


We also had a princess pit stop with dress ups, tiaras, and jewels, which was actually just the kids Ikea  storage unit repurposed with a bit of 'satin' from the craft store.

Fabric tiara by Terri Vandermeer

I made up the ruffled party bags myself CLICK HERE for a tutorial on how to DIY.

photo by Alyce Holzeberger

It was all worth it.....after the party Lilli gave me a big hug and said 'Thank you for my Party I loved it".

photo by Alyce Holzeberger

Cakes, macarons, cookies, marshmallows, choux puffs by  Bubble and Sweet
Photography Alyce Holzberg Photography
Entertainer (magic, balloons, party games) Super Steph
Printables PolkaDot Prints
Paper Pom Poms Ah Tissue
Pink Ceramic Cake Stand Clara French
Cake boxes and candy jars from 2 Garnish
Edible Jelly Jewels from Culpitt purchased at Party Animal
Fabric Shabby Chic Flowers  Karen McCubbin

photo by Alyce Holzeberger

Special thanks to Terri Vandermeer for her styling assistance and help Xx


Here are some pictures of the kids enjoying themselves at the party. Thanks everyone for sharing Lilli's special day.


Headwear by Karen McCubbin


EDIT UPDATE I found some similar kids dress up racks here over at Amazon as quite a few people have asked about them:


Above photo's by Alyce Holzeberger


Linda Vandermeer is a blogger, baker, maker and author of the cookbook ' Sweets on a Stick': More than 150 kid friendly recipes for cakes, candies, cookies and pies on the go!. Published in the US the book is available at most online book stores:


Or here at fishpond (Aus/NZ)

Sweets on a Stick: More Than 150 Kid-Friendly Recipes for Cakes, Candies, Cookies, and Pies on the Go!


Sunday, June 3, 2012

High Heel Shoe Cupcakes - high maintenance decorating


Once upon a time I was moderately fashionable, well as fashionable as you could get in Brisbane with regular shopping trips to Melbourne.

Oh the shoes that I had........


But now my shoes are made for walking, and running after toddlers and not having to worry about as I traipse through puddles with my 3 year old to get the other kids from school pick up.I never used to do puddles, but now I am reliving the joy of jumping in them.

I think I am a more balanced person overall now, but sadly my knowledge of what passes as fabulous footwear these days is limited to what I have seen recently on pintrest.


Originally I made up a batch of these to tie in with the fashion inspired dress cake and cookies for Naomi V Photography for the fun fashionista 10 year party styled by Putting on a Party.


a couple of people saw the photo's on facebook and asked if I could post a tutorial which is what I am doing.

These high heel shoes toppers are made of fondant using a JEMS cutter set I picked up. The place I bought mine from no longer carries them but I did spy some on Amazon so have a look here or google them, they are the mini ones that are 3" long..


Or in Australia here on Fishpond
Plastic Cutter Set, 8pc, Lady's Miniature Shoe 

 Although I am showing you using the cutter set as that is how I made the shoes if you want you could make your own by just drawing up some templates on cardboard, hand cutting with a knife and hand rolling the heel.

Normally I don't mind hand cutting myself, but these shoes are fiddly. I did not love making them, these shoes are high maintenance decoration. Although I only had to make 13 cupcakes, I did sets of shoes for each cupcake so that was 26 shoes, which by the way are pretty easy to break if you don't handle them right, so in reality a few more than 26.


For the fashion party I made cupcakes with a plain fondant top to sit the shoes on, which is pretty much just a cupcake covered with a tiny amount of butter cream and a round of fondant pressed on the top. The plain fondant covered cupcake is a nice looking base for the shoes. But I prefer the taste of butter cream topped cupcakes so I thought I might try out so see how they worked.


Yup, they worked ok although I think it's a struggle to get a pair of shoes to sit on the butter cream swirl and look as neat as the fondant. But in truth I could live with that, really who is going to eat 2 fondant shoes after a whole cupcake plus WAHOO it halves the number of shoes you need to make.


High Heel Shoe Cupcake Topper Tutorial
If you like you can use a little tylose powder kneaded into the fondant to make it a bit stronger (like gumpaste), or I guess buy gumpaste :) Tylose powder can also be used to make the edible glue. I used Bakels white fondant and Satin Ice black and red. All other colors were the Bakels tinted with gel food color.


Ingredients and equipment
Fondant
*optional tylose powder
Gel food color in your color of choice.
rolling pin
cornflour (corn starch)
Jems mini High Heel shoe cutter (3 inch)
toothpick or tool with pointed end
edible glue and brush
edible decorations for shoe

This is what you get in the JEMS cutter set

Color the fondant by adding drops of gel food color and kneading until well distributed. You may like to add a little tylose powder to the fondant to make it a bit stronger and easier to work with at this stage. I didn't but my shoes were pretty easy to break.

Make the heels. Roll a small ball of fondant and then shape into a cone.

Place the cone of fondant into one of the JEMS heel formers.


Press the other heel former carefully onto the first one so that the sides meet evenly. Excess fondant will squeeze out the sides, bottom and top, remove the excess with a knife and smooth the top of the heel where it will meet the sole.


If you can manage it a nice touch can be to add a touch of black to the base of the heel to look a little more realistic.

Carefully remove the heel formers taking care not to change the shape of the fondant heel. Place onto a piece of parchment paper with the large flat top of the heel facing downwards until required. If needed use a tool or your finger to smooth any join ridges that the heel former has heft on the heel.


Dust a workbench with cornflour (corn starch) and roll out fondant a couple of mm thick (1/16"). Holding the handle of the sole cutter, press the cutter into the fondant and cut out a sole.


OK decide if you want that impression to be on the top or the bottom - I didn't like the look of it on the top so it's the bottom of my sole although I have seen a number of pictures where it is the top. Your choice :)

Also if you would like a double sole so you can have for example a red base, just cut out 2 soles, brush some edible glue onto one and press them together.


Brush some glue onto the top of a heel and press the heel onto the sole as shown in picture example. Place a foam shoe former under the sole to help shape the shoe.

Roll out more fondant and cut out the shoe upper using the JEMS cutter. Attach a small amount of edible glue to the outer sides of the shape and using a toothpick or fondant tool press the shape onto the front of the sole, attaching one side, allowing the middle to arch up and then attaching the other side to the sole, as shown in the picture.


This process is quite fiddly and you may need some practice, plus you may knock the back heel section over and need to pick it up a number of times. Trust me it will get easier with practice.


You can cut out another of the shoe upper shapes to make a heel, using glue along the long length of the shape at attach it to the sole just above the heel. I did this with some of the shoes, although I also ended up making my own template for a back which was not so high.

There is also a strap cutter which comes with the set which can be used to make an ankle strap.


Once you are happy with the shoe shape add decorations to the shoe by making small ribbons, flowers, ruffles or 'brooches'. You can even hand paint on designs using food gel watered down with a  little rose spirits.


Other decorative touches can include adding sanding sugar or spraying luster spray.


I used the chocolate cupcake recipe from my book Sweets on a stick to make the cupcake bases for the pictures. It is actually a one bowl kid friendly recipe for 24 mini cupcakes, but in a pinch it can work for 10 regular cupcakes.


 Sweets on a Stick is available through most online book stores it is a US release aimed at getting kids involved in the kitchen. Here are the links to Amazon and Fishpond.


Or here at fishpond (Aus/NZ)

Sweets on a Stick: More Than 150 Kid-Friendly Recipes for Cakes, Candies, Cookies, and Pies on the Go!