Tuesday, November 11, 2014

Cherry spice cupcake recipe

(Tins and bowls Greengate from Simply Sweet Home)

So I love cake, I mean we all love cake don't we, but I usually love it even more when my cake is pretty and tastes good too.

I guess I'm kinda a bit shallow as I will nearly always go for the prettied up version given a choice.

Sophie Vintage bowl CLICK HERE

Which brings me to these cupcakes in the pictures.

I'm going to have to be honest and tell you, I preferred these cupcakes plain without frosting.

I know, I know my shallow facade is crumbling faster than I can polish off a cookie.

Red Coco Red tin shaker (used as cutlery holder) CLICK HERE

I guess in the end it's what's inside that counts to me.

But the good news is that if you bake these cupcakes in gorgeous little bowls like I did, they will look pretty with just a sprinkle of powdered/icing sugar and a few fresh cherries and you can let their natural beauty shine.

Anyhoo, I know I have shared that I adore Greengate stoneware here quite a few times, but seriously. Look at this stuff!

I picked up this latest lot at a new Australian shop Simply Sweet Homes CLICK HERE

Those little bowls are AWESOME they look so delicate, but I use them to bake all the time and then pop them in the dishwasher and they are still as good as new.

Set of 3 tins coco red CLICK HERE

Cherry spice cupcake recipe
Recipe will make 5 medium size bowl cupcakes (3/4 cup capacity) or 12 regular cupcakes. The cupcakes in the picture are decorated with a simple cream cheese frosting.

3/4 cup self raising flour (US 3/4 cup plus 1 rounded Tbsp)
2/3 cup caster sugar (US 2/3 cup plus 1 Tbsp)
140 g (5oz) unsalted butter softened
2 tsp ground cinnamon
1/2 tsp ground ginger
1/4 tsp salt
1 tsp vanilla extract
3 eggs rood temperature
1 cup pitted cherries

Optional to serve
Fresh cream whipped
Cherries
Icing/powdered sugar

Preheat oven to 160 C (fan forced) (320 F). Position rack in center of oven.

In a large mixing bowl combine all ingredients except the cherries and mix until well combined and there are no lumps. Fold the cherries into the mixture.

Spoon mixture into bowls or cupcake cases.

Place cupcakes into the oven and cook for approx 24-27 minutes for the bowls or 20-23 min for the regular cupcakes. The cupcakes will be golden when ready and a skewer inserted will come out dry.

Allow to cool.

Serve with a dollop of fresh whipped cream, fresh cherries and a sprinkle of powdered/icing sugar.

Sophie Vintage mini latte cup CLICK HERE

Linda Vandermeer is a blogger, baker, maker and author of the cookbook ' Sweets on a Stick': More than 150 kid friendly recipes for cakes, candies, cookies and pies on the go!. Published in the US the book is available at most online book stores. 

This post is not sponsored however I am related to the owner of Simply Sweet Homes.

Original Ideas, photography and recipes by Linda Vandermeer do not reuse without permission.  

Monday, November 3, 2014

Retro recipe - Caramel Macadamia Tart


Have I ever mentioned that Mr Sweet does not really love decorated cake.

It's just not his thing. He likes lots of sweet stuff like ice-cream and chocolate and pie, often all together.

Anyhoo, I am not just saying that randomly, I mention it because he really liked these 'caramel' tarts which I baked a while back.

In fact I made quite a few different versions and he pretty much liked them all. I think he's a fan of retro desserts, that is, anything from back when we were growing up :)


Also I know that cooking condensed milk is not truly caramel, but this is what we called it when I was growing up so I'm just going to have to keep calling it that.

Hopefully once you taste the crisp buttery shell combined with the creamy delicious filling you will forgive me.


Caramel Macadamia Tart Recipe - makes 6 tarts
If you do not care for macadamia nuts you can omit them from the recipe.

6 tart shells unbaked (click here for recipe and instructions) 8cm (US around 3")
1 tin condensed milk 395g (US 14oz)
1 Tbsp golden syrup (US - 1 1/2Tbsp use dark corn syrup if golden syrup not available)
60g unsalted butter (2 1/8oz)
1 cup raw unsalted macadamia nuts

Preheat oven to 180C (360 F)

Place unbaked tart shells into oven and bake for 7 minutes. Shells should be chilled and have baking paper and weights in place ready to blind bake.


Meanwhile place condensed milk, syrup and butter into a saucepan and cook over medium low heat stirring constantly for approx 8 minutes.

Remove tart shells from oven and remove baking paper and weights. Return to oven and bake further 5 minutes.

Reduce oven to 160 C (320 F)

Remove baked shells from oven and spoon condensed milk mixture in until 3/4 full. Mix the macadamia nuts into the remaining condensed milk mixture and then spoon onto the top of the partially filled tart shells.


Bake for further 8 minutes, the condensed milk mixture around the nuts should just start to turn golden.

Remove from oven and allow to cool, take the tarts out of the baking tins and the refrigerate for a few hours.

Store in fridge in an airtight container for up to 3 days.


Linda Vandermeer is a blogger, baker, maker and author of the cookbook ' Sweets on a Stick': More than 150 kid friendly recipes for cakes, candies, cookies and pies on the go!. Published in the US the book is available at most online book stores.

Original Ideas, photography and recipes by Linda Vandermeer do not reuse without permission. 


Tuesday, October 21, 2014

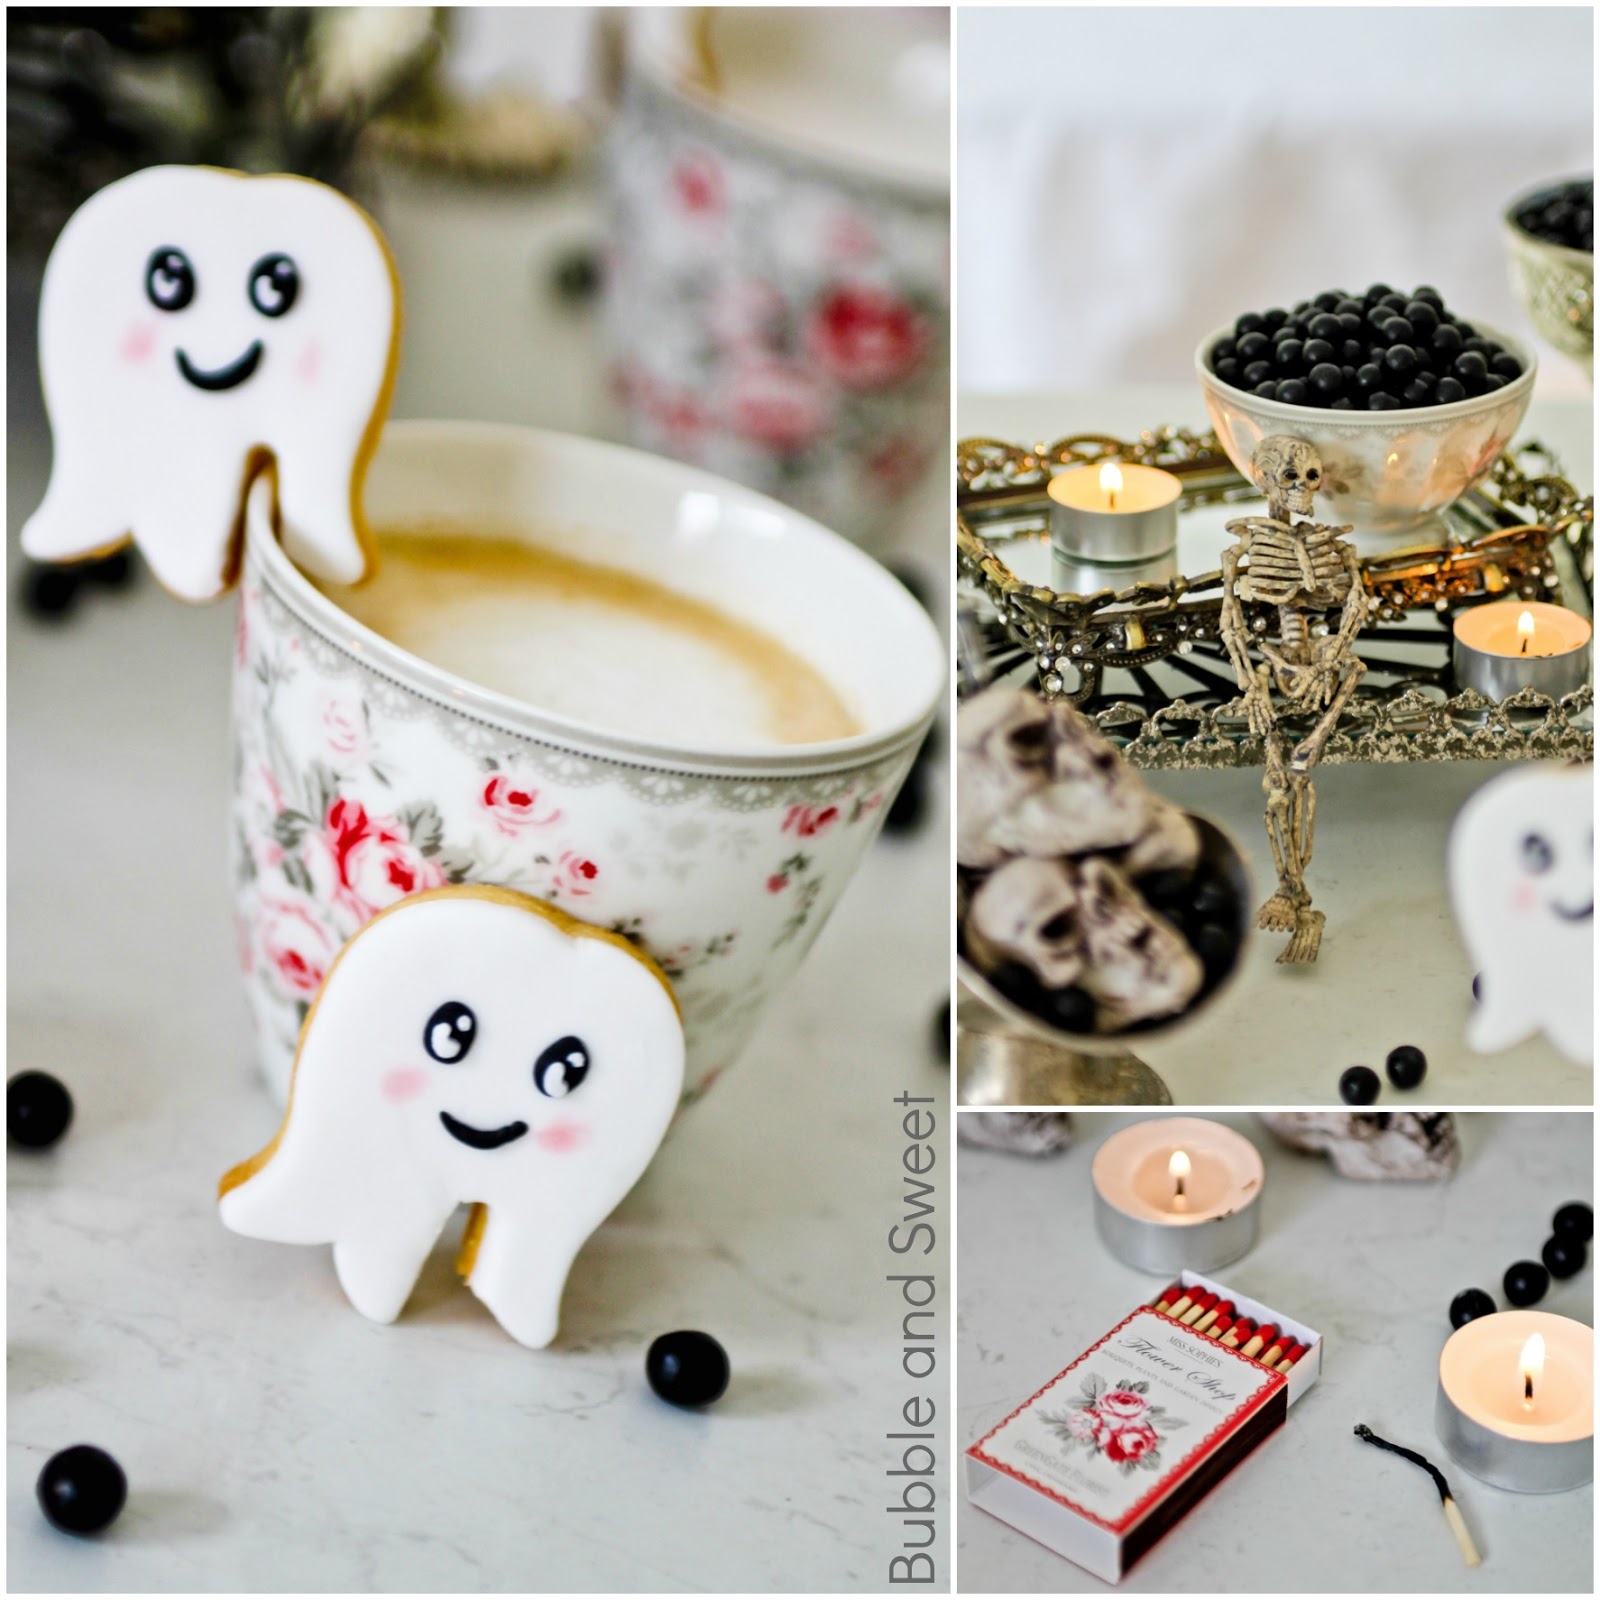
Happy ghost cup edge cookies for Halloween


Believe it or not this may be my only Halloween post this year. Yes that's right this is a Halloween post despite the pretty floral china in the photo's.


I am what I am and at the moment it seems happy ghosts that are too cute to scare anyone perched on the edge of  latte cups are on the menu around here.


Anyhoo the fun thing about these cookies is that the cutter is not a ghost cookie cutter, or even a cup edge cookie cutter.

Nope these cutters are upside down tulip cutters and the edge of the broom from a witch cookie cutter.


I've seen tulip cutters used for ghost cookies all around the place at the moment they seemed to be the perfect size and as luck had it I had some tulip cutters on hand.


Works out pretty sweet - huh. If you prefer royal icing to fondant you can of course make the cookies by outlining and flooding with white royal icing and then piping on the eye and mouth detail, otherwise to make as I have follow the instructions below.

Oh and if you like these cup edge cookies you should check out the sweet deer ones I made for Christmas last year.


Happy Ghost tutorial
If you prefer just to make cute ghost cookies that do not sit on the edge of your coffee cup just omit the section where you cut out the indent.

Sugar cookie dough (recipe below)
Rolling pin
Tulip cutter (I used Cake Boss Decorating Tools 4-Piece Springtime Fondant Press Set, Red )
Any cutter with a thin long section (mine was a witch from a bucket of cookies or alternatively use sharp knife to hand cute shape)
White ready roll fondant ^
Black ready roll fondant ^ (optional use a edible pen instead)
Small plastic rolling pin
toothpick
cornflour (corn starch)
2 small brushes
water
pink edible dusting powder

 ^fondant dries out quickly, when not in use store in an airtight container or ziplock bag. To use fondant knead until pliable and smooth and roll out on a workbench dusted with cornflour (cornstarch).


Using the cookie recipe and instructions below cut out and tulip cookies then using the broom section of the
witch cutter cut out thin indent from the bottom of the cookie as per pictures below. Cook as per instructions until golden.

Knead white fondant until smooth and pliable. Dust workbench with cornflour (corn starch) and roll out fondant until quite thin then using the tulip cutter cut out a fondant shape, then using the witch broom cut a thin indent the same as the cookie (see picture below).

Brush water onto the cookie and adhere the fondant, use the rolling pin to smooth the fondant into place.

Break off two small pieces of black fondant and press into oval shapes, press onto ghost cookie for eyes. Pinch of two very small amount of white and roll into a small ball, press one onto each of the black eye, use the toothpick to press in the top right corner of the circle to make the eye, then pinch off an even smaller bit of white fondant and press it into the top right corner of the black oval eye.

Make a mouth by rolling a small amount of black fondant into a thin rope, curving into a smile and pressing into place.

Use a clean dry brush to lightly dush pink cheeks on either side of the mouth as per picture.

 
Sugar Cookie Recipe (will make around 60 to 80 small ghost cookies)

460 grams plain flour (16 1/4 oz all purpose flour)
1/4 tsp baking powder
1/4 tsp salt
230 grams unsalted butter (8 1/8oz)room temperature
220 grams caster sugar (7 3/4 oz superfine sugar)#
1 large egg
1 tsp vanilla extract
#use regular white sugar if you do not have caster/ superfine sugar

Sift together flour, baking powder and salt.

Cream butter and sugar in a large bowl using an electric mixer until light and fluffy. Reduce the speed to medium low, add the egg and vanilla and mix until combined. Reduce mixer speed to low and mix in the sifted flour mixture until combined. Wrap the dough in plastic and chill in fridge for 30 minutes or so.

Line a few baking trays with parchment/ baking paper.

Dust workbench with plain flour and using a large rolling pin roll out the dough until around 1/2 cm (1/4") in thickness. If the dough is to hard you may need to work/knead it a bit until you can roll it out.

Cut out cookies shapes and place the cookies on the prepared trays. (Knead and reroll dough as necessary, if it becomes to soft you can pop it back in the fridge.)

Pop the cut cookie dough trays into the fridge to chill again for around 30 minutes until firm (or in the freezer for 10 minutes).

Preheat oven to 160 C (320 F) and cook the cookies until they just start to turn golden, around 15 minutes (less or more depending on cookie size).

Cool on trays for 5 minutes and then carefully lift onto a wire rack to cool completely prior to decorating.

- Cookies can be stored in an airtight container for 1 week


Linda Vandermeer is a blogger, baker, maker and author of the cookbook ' Sweets on a Stick': More than 150 kid friendly recipes for cakes, candies, cookies and pies on the go!. Published in the US the book is available at most online book stores.

Original Ideas, photography and recipes by Linda Vandermeer do not reuse without permission.