Sunday, August 26, 2012

Cute bird cake pops, flower cookies and a bit of a whinge


EDIT UPDATE
I now have a quick youtube video on how to make a similar version of bird cake pops CLICK BELOW PICTURE LINK:

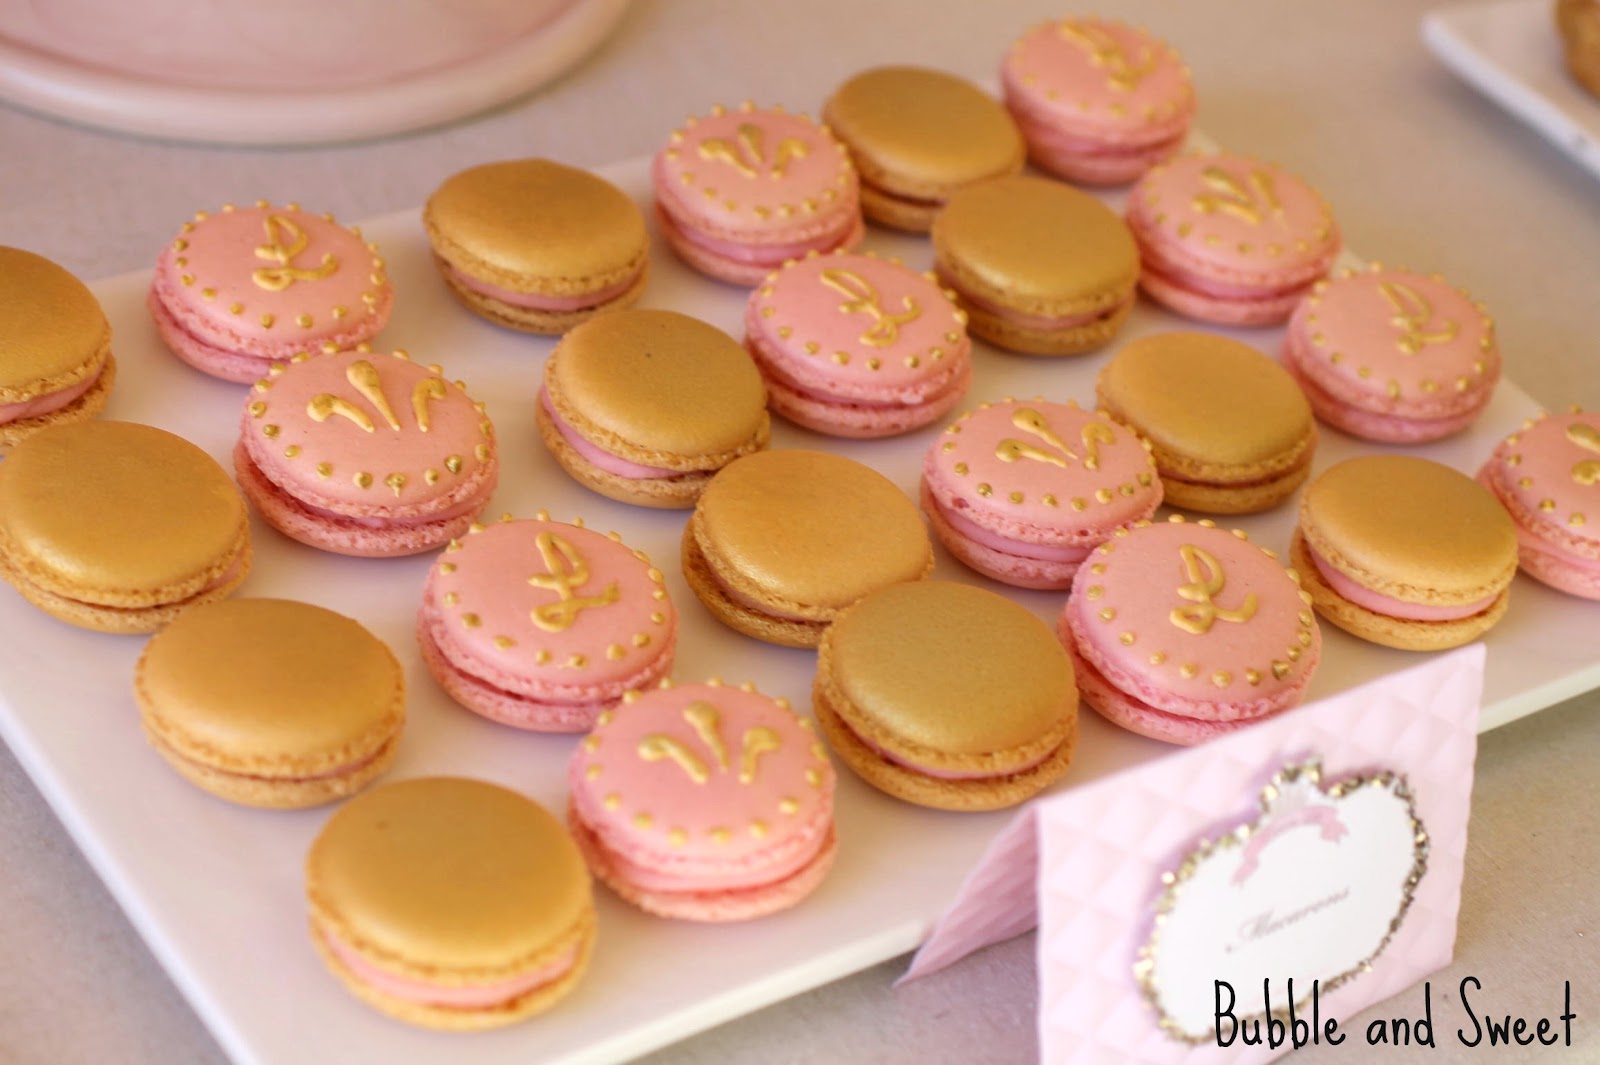
Here is a quick peek of some of the treats from Sophie's birthday party.

Uh-huh super cute. They are actually a little display of yummy treats that I made using the recipes and instructions from Sweets on a Stick, just modified a little bit (tips at the bottom of the post).

I know what your saying - what's with the peek? Can you just show the whole party for goodness sake?


Well sadly, the day after Sophie's super fun party, she ended up in hospital for a few days, and then when she got out our 3 year old son....The Destroyer, ended up with a row of stitches on his head.

Added onto that, Mr Sweet and I have also been flu-ish, and I have not really had a chance to sort out the photos and type up a post. Sorry all.


And all the illness is probably why I am soooo cranky and about to have a huge whinge, which let's face it is generally not attractive and something I mostly avoid.

So apologies in advance, but here goes....a while back at the request of a publisher I wrote a book called Sweets on a Stick. Yes that's right the same book that I spruik non stop on this blog.

Edit 31 August - OK there still seems to be some confusion. So before you read on Sweets on a Stick is still a color book. There was a very small print on demand in black and white which was an error...this problem has been fixed and all future copies WILL be color. If you do have a black and white copy you should request for it to be replaced.....ok back to the original post.

Everything seemed ok and then a few months into this year I used an Amazon gift card I had for some stuff and I purchased 2 copies of my book. Still all good but then when they turned up they were black and white - yup, for Real. That is totally not how they were meant to be, it clearly states on the back cover of the book that the pictures should be color (plus I already had other copies from the publisher which I had seen and knew that it was wrong).

When I emailed Amazon they offered to refund the money or send me another 2 copies, so I chose the 2 color copies, which solved my black and white problem pretty easily.

Then I contacted the publisher to find out what was going on and they advised that Amazon has a process where they can print on demand themselves, so it seems what happened is Amazon (or maybe a company that works for them) printed the book in black and white and sent it out that way.

You know mistakes happen, heavens know I'm not perfect by a long shot, so I was happy to let it all go.

But I guess they didn't rush out to replace all the black and white copies that were printed and sent out in error.
Image from Sweets on a Stick - yes they are supposed to be color :)

Because now there is a comment from someone who received one of those black and white books from Amazon on the Amazon website stating the book is black and white. And as it turns out people do read that stuff as I get quite a few comments from people asking whether it is really black and white.

Sadly Amazon will not remove that comment, even though it is not a true reflection of the book, but rather their own faulty Print on Demand system. I sent them a polite email and when they said they would not remove the comment. I followed up as I thought as it was their (or a company that works for them) mistake, and as the book is not really black and white surely they would have to remove the comment? But no - they just told me the matter was no longer up for discussion and thanked me for my understanding.

Yup - I am totally not understanding that.

Image from Sweets on a Stick - yup still supposed to be color :)

Anyhoo as there is not really that much I can do I'll just recap for y'all.....Sweets on a Stick does have Color pictures. If you have received a copy that is not color I suggest you contact whomever you bought it from (I'm guessing Amazon) and ask for a replacement. It has 50 color pictures which is around 1 picture for every 3 recipes, and yes I wish every recipe had a picture but a decision was made by the publishing team to print in the US instead of overseas and it had some impact on the number of pictures that could be used.


Sweets on a Stick is aimed at kids and getting kids in the kitchen and some of the recipes are pretty simple as a result. The recipes, although easy to make, taste good and I use lots of them on a regular basis myself. Sweets on a Stick is published in the US and uses ounces etc, but there is a conversion chart at the back to metric.

Anyway Sweets on a Stick available at the Book Depository and Fishpond, you know I guess as well as some other big book stores that we no longer support here at Bubble and Sweet :) Doh I so don't have the time it's going take to go through the blog to swap all the links, but I'm doing it anyway.


Book Depository: Sweets on a Stick


Fishpond: Sweets on a Stick: More Than 150 Kid-Friendly Recipes for Cakes, Candies, Cookies, and Pies on the Go!

Handmade paper pom pom from Ah-Tissue

Bird Cake Pop modifications - To get a cute open beak follow the instructions in Sweets on a Stick and replace the beak with 2 extra heart sprinkles by attaching the curved top of the sprinkle to the bird before the candy coating has set. See picture for example of placement. I colored my own candy coating light blue using Flocoat and Wedgewood blue gel color (ratio 5 drops flocoat to 1 drop gel food color).

Flower Cookie Pop modification - the cookies in the above picture are made using a smaller blossom/ flower cookie cutter.

All photo's by Terri Vandermeer 
Pom Poms - Ah-Tissue

Sunday, August 19, 2012

Pink and Gold decorated Shabby Chic princess macarons


I always feel a bit weird when I decorate a macaron.

Generally it seems like it's frowned upon, but seeings as I'm just a home cook and not a fancy patisserier I  can do what I want and be inspired by what my family likes rather than being constrained by tradition :)

Plus these ones are decorated with just an incy bit of royal icing that melts in your mouth along with the macaron.

I think that's totally ok, don't you?

Photo by Alyce Holzberger Photography

Oh well, who really cares anyway. They are sooo pretty and yummy as well and I didn't hear any complaints when they were served.

These pink and gold macarons were made for Bubble's 8th birthday party to tie in with the shabby chic with a glitzy twist princess theme.

Lilli's Shabby Chic Princess 8th Birthday Party CLICK HERE for more party photo's
Photo by Alyce Holzberger Photography

To make the gold macarons I simply colored half the macs with a touch of yellow and ivory to make a 'golden' base colour, filled them with pink ganache and then I airbrushed them with americolor gold sheen.

Photo by Alyce Holzberger Photography

Yup pretty simple. I borrowed an air brush from my friend Sam over at Caketopia, but you could just as easily use a tin of edible gold spray like the ones from PME or Wilton. That's what I normally do.

For the pink hand piped macarons, I coloured the macarons medium pink and filled them with pink ganache.


Then I hand piped a design in the middle using some royal icing that I had coloured with yellow and ivory.

I often do a little bit of practice piping on some parchment paper before I start on the actual macarons. Umm it doesn't help me that much I am still pretty messy :) But I guess, imagine what it would be like if I didn't practice first.


Some of the macarons I piped an initial and some a few lines reminiscent of a rough fleur de lis.


Then I piped a row of dots around the edge of the macaron.


I allowed the royal icing to dry and then using a clean fine paint brush (one that I only use on food items) I hand painted the piped details with some edible gold paint mixed in with gold lustre dust and rose spirits.


Viola pretty hand piped macarons, just perfect for a princess party.

Macaron Shells makes around 40 shells or 20 filled macarons

190 gram (6 5/8 oz)almond meal (almond flour)
190 gram pure icing sugar (6 5/8 oz powdered sugar)
190 gram granulated sugar (6 5/8 oz)
48 grams water (1 5/8 oz)
140 gram egg whites aged split into 2 lots of 70grams each (5 oz split into 2 lots of 2 1/2oz each)*
food color of choice (I use gel type food color like Wilton)

*ageing egg whites refers to separating the yolks from whites and then leaving the whites to age for a few days. This can be done on the counter if your countries climate permits or in the fridge, wrap the bowl with plastic wrap and then pop a few holes in the top. Alternately you can pop fresh egg whites in the microwave on high for 10 seconds or so - I used the microwave method in this batch pictured.

1. Mix the ground almonds and icing sugar together and pulse a few times in food processor to make almond meal finer. Do not over process as the meal can become oily. Sieve into a large bowl. Add colour and 70g (2 1/2 ounce) of the egg whites to the sugar/almond mixture but don’t mix in.

2. Place remaining 70g (2 1/2 ounce) of egg whites in bowl of mixer fitted with the whisk.

Yup - I really use this super old fashioned thermometer I have had for about 20 years to make my macarons

3. Pop granulated sugar and water into saucepan stir to combine and cook without stirring to 118C (245 F). Brush down the sides with a pastry brush dipped in water as required to avoid the sugar crystallizing. Once the mixture reaches 115C (240 F) start mixing the egg whites on high. Make sure you have a pouring shield on your mixer, when the sugar syrup reaches 118C (245 F)remove from heat and immediately pour in a thin stream down the side of the mixer bowl continuing to whisk on high.

4. Continue to whisk the meringue on high until the side of the bowl is only a little warm to touch, around 50C (120 F).


5. Add meringue mixture to almond mixture and using a large spatula fold the mixture together until it starts to shine and forms a ribbon that disappears back into the mixture after about 20 seconds.


6. Add the mixture to a piping bag fitted with a plain tip (or just cut the end of a disposable piping bag, that's what I do) and pipe in lines onto parchment lined baking sheets. To make the macarons as even as possible I apply a constant slow pressure to the piping bag and count a few numbers like up to 3 for each one.


Waiting to form skins after piping


If your mixture has peaks after you have piped a couple of rows that do now sink back down you macaron mixture needs more mixing. Pop it back in the bowl and mix it a bit more

7. Set aside for about 30 minutes or until the macarons have formed a skin so that the macaron mixture does not stick to your finger when gently touched. If the weather is humid this step may take longer up to 2 hours. I pop on the aircon if it's humid at my house.

Baking in the oven. The macarons will rise after a few minutes in the oven and develop a frilly foot
Eeek- can you see some of those less than perfect under mixed mac's in the back  that I pointed out 
in the previous picture - they do not have a flat shiny top. That's so not mac-cool


8. Meanwhile preheat oven to 140C (285 F). Once ready bake the macaroons for around 13 to 15 minutes depending on size, it may take longer, all ovens are different. If they are baked and you gently push on the side the tops will not move, if the tops do move do bake for another minute or 2. Also they should not be browned if they are reduce the heat for the next batch or bake for less time.

9. Once baked remove the baking trays and immediately slide off the macarons and the parchment onto the work surface and let cool completely before removing the shells.

10. Once cooled match disks into like sizes and sandwich together using the ganache.

To make ganache melt white chocolate with cream in the microwave and mix gently until combined, use a ration of 3:1, so for example 300 grams white chocolate to 100 grams cream, sorry guys I measure as I already have the scales out and I can't be bothered messing up a liquid measuring jug :) Add some gel color and raspberry flavor to taste.
Linda Vandermeer is a blogger, baker, maker and author of the cookbook ' Sweets on a Stick': More than 150 kid friendly recipes for cakes, candies, cookies and pies on the go!. Published in the US the book is available at most online book stores.

Affiliate links may earn me money and contribute to supporting this blog.

Original Ideas, photography and recipes by Linda Vandermeer do not reuse without permission. 

Sunday, August 5, 2012

Pink Shabby Chic Princess Party for Lilli's 8th Birthday


Lilli just had her 8th birthday party and she decided on a sweet princess party with a color scheme of pink, gold and white.

Sweet, Bubble and Charlie.....Photo by Alyce Holzberger

EDIT UPDATE: Here is a link to the princess dress Bubble is wearing and a couple of others they have:


I am pretty sure our recent trip to Disneyland and the number of people telling her she looked like Cinderella had no part whatsoever to play in her decision :)

Candy jars from 2 Garnish

Regardless of the reasoning I was more than happy to oblige. I've mentioned before that my tastes run towards pastel and pretty and Princess is totally a theme within my comfort zone.

The party had a bit of a shabby chic feel and a touch of glittery glitz to reflect Lilli's sweet, fun and vibrant personalty.

photograph by Alyce Holzberger

I was lucky enough to be able to borrow the ruffled tablecloth from my SIL. It is linen with a white ruffle layer in the middle and was a great background for the pink white and gold food.

photograph by Alyce Holzberger

I modified it with some pink muslin fabric and a scattering of handmade shabby chic fabric flowers.


We used the same flowers in pink frames behind the table to add a bit of texture and interest on the plain white walls. The same effect could be achieved with paper poms.


I hung a handful of paper pom poms in light pink, tan and white from Ah-Tissue to continue the ruffle theme.

photograph by Alyce Holzberger

Of course we did have to have a princess themed cake and I decided to make a ruffle cake (which we still love at the moment in this household). The tiara is totally edible made from fondant, edible jelly jewels and painted with gold lustre dust. More photo's of the cake and what I used to make the tiara can be found in my previous blog post CLICK HERE.

Royal sugar cookies with edible jelly jewels, gold luster dust and ruffles

Royal cookies were an assortment of cookies in gold, pink and white that were a little bit more mature than the cookies we generally make for the kids parties. My little girl is growing up and the treats while still fun are more reflective of her tastes. They are fondant covered sugar cookies (recipe from Sweets on a Stick) decorated with rolled fondant, royal icing (recipe from Sweets on a Stick) and edible jelly jewels. The white cookies with the jewel and gold royal icing piping were her favorite. Mine were the ruffled cookies.


To keep in with the pink and gold royal theme I made the macarons in pink and gold with hand piped and painted decorations on the pink batch.


Princess delights were round choux pastry puffs with raspberry pastry cream, fondant and raspberries.


To dress up a packet of simple marshmallows I popped them on a stick, dipped them in pink chocolate/ candy coating, added a jelly jewel, piped a 'royal' decoration which was painted with gold edible paint.


Candy consisted of 4 different flavors of bon bons and twisted rope marshmallow cut into shorter pieces.


I picked up the princess printables from Polkadot Prints (who are one of my favorite designers with a fun blog as well) and did a bit of glittering.

photograph by Alyce Holzberger

Cardboard cake boxes are from Robert Gorden, I picked them up at 2 garnish, they come flat pack with double sided tape already in place. Seriously I was so behind in my preparations the Friday before the party I took them along to the kids swimming classes and put them together in the viewing areas. I was folding and sticking those boxes in between waving at the kids and giving them thumbs up signs through the glass barrier.


We like to have the parties at our house and this year the timing was not great as we are having some minor renovations. The painters packed up at about 2pm on the Friday ready to return bright and early Monday morning which did not leave a lot of time for me to bake and decorate for the event.

photograph by Alyce Holzberger

Knowing this in advance, I arranged for an entertainer to come and manage the kids which took some of the pressure off as I had no need to think up party games, or buy prizes and I could focus on what I love which is the food.

Tiara by Terri Vandermeer photograph by Alyce Holzberger

I booked in Super Steph - and she truly was super.


The kids adored her magic show, they were totally enthralled, and as a result the mums and dads adored not having to worry about looking after the kids at all.


We also had a princess pit stop with dress ups, tiaras, and jewels, which was actually just the kids Ikea  storage unit repurposed with a bit of 'satin' from the craft store.

Fabric tiara by Terri Vandermeer

I made up the ruffled party bags myself CLICK HERE for a tutorial on how to DIY.

photo by Alyce Holzeberger

It was all worth it.....after the party Lilli gave me a big hug and said 'Thank you for my Party I loved it".

photo by Alyce Holzeberger

Cakes, macarons, cookies, marshmallows, choux puffs by  Bubble and Sweet
Photography Alyce Holzberg Photography
Entertainer (magic, balloons, party games) Super Steph
Printables PolkaDot Prints
Paper Pom Poms Ah Tissue
Pink Ceramic Cake Stand Clara French
Cake boxes and candy jars from 2 Garnish
Edible Jelly Jewels from Culpitt purchased at Party Animal
Fabric Shabby Chic Flowers  Karen McCubbin

photo by Alyce Holzeberger

Special thanks to Terri Vandermeer for her styling assistance and help Xx


Here are some pictures of the kids enjoying themselves at the party. Thanks everyone for sharing Lilli's special day.


Headwear by Karen McCubbin


EDIT UPDATE I found some similar kids dress up racks here over at Amazon as quite a few people have asked about them:


Above photo's by Alyce Holzeberger


Linda Vandermeer is a blogger, baker, maker and author of the cookbook ' Sweets on a Stick': More than 150 kid friendly recipes for cakes, candies, cookies and pies on the go!. Published in the US the book is available at most online book stores:


Or here at fishpond (Aus/NZ)

Sweets on a Stick: More Than 150 Kid-Friendly Recipes for Cakes, Candies, Cookies, and Pies on the Go!