Showing posts with label strawberry. Show all posts

Saturday, November 16, 2024

Ring of Roses Strawberry Layer Cake


It's just been our birthday time of the year when we are lucky enough to celebrate a birthday every month, and no matter what ever else happens in life or how old we are, Birthday Cake is always a must.

Bubble's birthday is the first off the rank and she chose strawberry cake which has been a family favourite since as long as I can remember. It is a pretty pink cake flavoured and coloured using jelly crystals (jell-o box) which makes for a consistent cake all year round. My family recipe has had a few tweaks over the years so I've included the current recipe below.

The birthday girl decreed only a small amount of frosting. I decorated simply by covering with Italian Meringue buttercream (recipe below), adding some texture with varying shades of contrasting buttercream and edible gold and added a ring of big sweeping rose swirls on top using a 1M tip alternating between pink and white and then with random piped leaves. The pink colour is sugar flair dusky pink/wine and the green is sugar flair eucalyptus. Italian Meringue buttercream uses whipped egg whites and a sugar syrup and takes a bit more work than simple American buttercream. I like to use it as it is lighter and less sweet to my taste. 


To give the cake a bit of a lift I added pistachio cream between each layer, which to be honest, although nice was not really worth the effort (**keep your eyes out for a pistachio ganache recipe I have coming up which will be worth the wait). The pistachio cream was from Costco but seriously you can just leave it out and the cake will be just as lovely.


If you want to see another version of this strawberry cake decorated in a different way check out this sweet strawberry candy girl cake here on my blog. 

xx

Linda  

Pretty rose swirl strawberry cake - makes a 6 inch 3 layer cake

- 3 x 6" strawberry cakes (see recipe below)

- 1 x batch Italian Meringue buttercream (see recipe below)

- 1 cup Pistachio cream (optional) warmed in microwave just for a short time until it easily is spreadable but not hot.

Assembly Instructions

You can make this cake 2 or 3 days before you serve. Bake the cake, cool and wrap in plastic wrap. I trim the brown edges off this cake but you don't need to, I do it because I like the look of the sliced cake. You will however need to trim off any domed top to make 3 cakes approximately the same height.

-Place the bottom layer onto a 6"cake board (or straight onto a plate or stand if you are not using the cake board). 

-Pop a small dollop of buttercream under the cake to secure it in place and then using an offset spatula spread a layer of buttercream over the top. 

-Put some buttercream into a piping bag wth a large round tip and pipe a dam around the edge of the cake (see picture below). Spoon in half the pistachio cream and pop into fridge to chill until buttercream is firm. 

- Remove from fridge and top with a thin layer of buttercream to seal the pistachio cream. Add the next layer and repeat the above steps of spreading a layer of buttercream, piping a dam,  adding the pistachio cream and placing in fridge to chill again.

- Remove from fridge, top with a thin layer of buttercream to seal the pistachio cream, add the final cake layer and cover with a thin crumb coat, smoothing the sides and top. Place into fridge to chill until buttercream is firm to touch.

- Reserve around 1 1/2 cups plain white buttercream and colour the remainder in pink.

- smooth the pink buttercream over the cake in a thin layer, if you can't get it perfect do not stress, this cake has an imperfect textured look to it. If you have a cake turntable and a cake scraper it is easier to achieve a smooth finish, but if not use a knife or offset spatula to the best of your ability. I have been known to use a clean plastic ruler in a pinch. 

- Put the remaining pink and the white buttercream into seperate piping bags with a 1M tip and pipe the roses. If you look at my cake closely you will notice that there are only 3 pink swirls and 5 white swirls, with some pink stars piped in-between. The key here is to do what you want, it's your cake be creative. I also piped a border around the bottom with a small star tip. Then I coloured a small amount of the remaining white buttercream green (eucalypt) and piped the leaves. Pop into fridge to chill until firm.

I wanted a rustic casual look and added some of the left over buttercream to the sides randomly and smoothed it in with an offset spatula. Finally after another quick chill I added some edible gold leaf.


Sweet Strawberry Layer Cake (divide the batter into 3 x 6" pans to make a 4" high filled cake)
The jelly (jello) used in this recipe is the dry sugar crystals in the packet. If cake flour is not available use 310g (11 oz) plain (all purpose) flour and add 40g (1 3/8 oz)of cornflour (corn starch) instead.
*Note I like to use weight instead of cup measurements as standard cup sizes are not the same in USA and Australia.

350g (12 3/8oz) cake flour
2 1/2 tsp baking powder
200g (7oz) sugar
1 packet strawberry jelly crystals (jell-o) 85g (3oz approx)
225g (8 oz) unsalted butter at room temperature
4 large eggs at room temperature
1 tsp vanilla extract
240ml (8 1/2oz) full fat milk
135g (4 3/4oz) no fat greek yogurt 

Preheat oven to 170 C  (340 F) fan forced. Line the base and sides of 3 x 15cm (6") tins or 2 x 20cm 8" tins.

Sift the flour and baking powder and set aside until needed.

In the bowl of a large mixer at high speed cream together the butter, sugar and jelly (jello) crystals until light and fluffy.

Reduce speed to low and add the vanilla and then eggs one at a time mixing until combined and scraping down the sides as required.

Add 1/3rd of the flour mixture, mix at low speed until just combined scraping down sides as required. Add 1/2 the milk and mix until combined and then another 1/3rd of the flour mixture once again mixing and scraping down the sides.

Add the remaining milk and all of the yogurt and mix until combined and then the final third of flour making sure the sides and bottom of bowl have been scraped down and no lumps of flour are remaining.

Divide the mixture evenly between the prepared tins.

Bake until the cake is cooked all the way through and a skewer inserted comes out dry approximately 45 minutes.


Italian Meringue Butter cream This batch will make enough to fill and cover the cake and extra to decorate with buttercream flowers as in the example.

Make sure your bowl and mixer are clean to whip egg whites. I use a stand mixer with a pouring shield to make this butter cream, the sugar syrup is very hot, make sure you take appropriate safety precautions when pouring the hot sugar syrup mixture. Not suitable for young children to make.

300g white sugar (12oz)
75g (2 3/4oz) water
5 egg whites
450g (1 pound - 4 sticks) unsalted butter cut into smallish cubes
1 tsp vanilla extract

Place sugar and water into saucepan over high heat and bring to boil. Conintue to  heat until the sugar syrup mixture reaches 115 C (240F). Brush down the the sides of saucepan with a wet pastry brush as required to stop sugar crystals from forming.

Place the egg whites in the bowl of your mixer (make sure the bowl is quite large). When the sugar syrup reaches 110C (210F) start to whip the egg whites at high speed.

Once the sugar syrup reaches 115C (240 F) carefully pour the syrup into the whipped egg whites whilst the mixer is still beating on high.

Continue to beat until the egg and sugar mixture cooled to room temperature (or the bowl feels cool to touch) and then start to add a few cubes of butter at a time. Add the vanilla.

The mixture may become quite liquid, but continue to beat until it thickens and all the butter is evenly distributed. If necessary pop the mixing bowl into the fridge to cool down a little then continue to mix.


I love when people share my blog ideas and give credit. All posts contain original ideas, photography and recipes by Linda McCubbin unless otherwise credited. Please feel free to link back to my blog for non commercial purposes.

Monday, September 7, 2015

Sweet Strawberry Layer cake


I have such a treat for you this week. I am finally sharing my sweet strawberry layer cake recipe here and yes I don't know why it has taken me so long although perhaps you will forgive me when I tell you I have been tweaking it over the years to come up with the delicious version in the top photo.

Picture by Alyce and Colette Photographers

The secret my dear friends is...........strawberry jelly (jello) crystals which gives the cake both the flavour and the colour in one go.

I have been using it for years as it's such a favourite with the kids.

In fact when I made it for Sweet's recent birthday after not using it for a year or so and The Destroyer was licking the bowl* he said it tasted like berry pancakes and told me that if the finished cake tasted the same it would be the most amazing cake I ever made.

*(I know he shouldn't do that with raw egg but seriously I am only human and he was begging.)

(for this version replace the yogurt with strawberry puree)

The 3rd picture above is of an older version of the cake back when I used to add puree strawberry in place of yogurt, which is still good and I'm telling you just in case you would like to try it out yourself.

The finished cake cuts very well and is quite moist so you can make it a few days ahead and decorate as needed. The only downside is that it has quite a brown hard crust which I think is better removed for decorating if you want the cake to look nice once sliced. But I pretty much do that for all my cakes anyway.

I like to fill this cake with a light vanilla Italian Meringue Buttercream which I guess kinda makes it a strawberry and cream layer cake and totally delicious and I have included a recipe at the bottom of the post.When filling I find it best to chill the cake in the fridge for a few minutes between each layer.

I hope you try my strawberry ckae and that it becomes a family favourite for you like it has for me.


Sweet Strawberry Layer Cake (divide the batter into 3 x 6" pans to make a 4" high filled cake)
The jelly (jello) used in this recipe is the dry sugar crystals in the packet. If cake flour is not available use 310g (11 oz) plain (all purpose) flour and add 40g (1 3/8 oz)of cornflour (corn starch) instead.
Note I like to use weight instead of cup measurements as standard cup sizes are not the same in USA and Australia.

350g (12 3/8oz) cake flour
2 1/2 tsp baking powder
200g (7oz) sugar
1 packet strawberry jelly crystals (jello) 85g (3oz approx)
225g (8 oz) unsalted butter at room temperature
4 large eggs at room temperature
1 tsp vanilla extract
240ml (8 1/2oz) full fat milk
135g (4 3/4oz) no fat greek yogurt (I use Chobani)

Preheat oven to 170 C  (340 F) fan forced. Line the base and sides of 3 x 15cm (6") tins or 2 x 20cm 8" tins.

Sift the flour and baking powder and set aside until needed.

In the bowl of a large mixer at high speed cream together the butter, sugar and jelly (jello) crystals until light and fluffy.

Reduce speed to low and add the vanilla and then eggs one at a time mixing until combined and scraping down the sides as required.

Add 1/3rd of the flour mixture, mix at low speed until just combined scraping down sides as required. Add 1/2 the milk and mix until combined and then another 1/3rd of the flour mixture once again mixing and scraping down the sides.

Add the remaining milk and all of the yogurt and mix until combined and then the final third of flour making sure the sides and bottom of bowl have been scraped down and no lumps of flour are remaining.

Divide the mixture evenly between the prepared tins.

Bake until the cake is cooked all the way through and a skewer inserted comes out dry approximately 45 minutes.


Italian Meringue Butter cream This batch will make enough to fill and cover the cake and extra to decorate with buttercream flowers as in the example.

Make sure your bowl and mixer are clean to whip egg whites. I use a stand mixer with a pouring shield to make this butter cream, the sugar syrup is very hot, make sure you take appropriate safety precautions when pouring the hot sugar syrup mixture. Not suitable for young children to make.

300g white sugar (12oz)
75g (2 3/4oz) water
5 egg whites
450g (1 pound - 4 sticks) unsalted butter cut into smallish cubes
1 tsp vanilla extract

Place sugar and water into saucepan over high heat and bring to boil. Conintue to  heat until the sugar syrup mixture reaches 115 C (240F). Brush down the the sides of saucepan with a wet pastry brush as required to stop sugar crystals from forming.

Place the egg whites in the bowl of your mixer (make sure the bowl is quite large). When the sugar syrup reaches 110C (210F) start to whip the egg whites at high speed.

Once the sugar syrup reaches 115C (240 F) carefully pour the syrup into the whipped egg whites whilst the mixer is still beating on high.

Continue to beat until the egg and sugar mixture cooled to room temperature (or the bowl feels cool to touch) and then start to add a few cubes of butter at a time. Add the vanilla.

The mixture will probably become quite liquid, but continue to beat until it thickens and all the butter is evenly distributed. May take around 10 minutes.


Linda Vandermeer is a blogger, baker, maker and author of the Children's cookbook Sweets on a Stick: More Than 150 Kid-Friendly Recipes for Cakes, Candies, Cookies, and Pies on the Go! Published in the USA in 2011 the book is still available at Amazon and many online bookstores.

Affiliate links may earn me money and contribute to supporting this blog.

Original ideas, photography and recipes Linda Vandermeer please do not reuse without permission.


Wednesday, September 3, 2014

How to make a macaron, marshmallow and strawberry tower


It all started with the marshmallows I had left over from Sweets party but it didn't end there.......

Yup I had strawberries left over as well. Lots and lots of strawberries. Now I'm not going to dwell on the obvious issue which is why I didn't just put them out on the dessert table regardless of whether they colour matched the rest of the stuff.


I'm a glass half full type of girl so I decided to take those strawberries and the rest of the left overs and make them so fabulous that no one could resist them.

I had already made up my pretty macaron and marshmallow tower and then I thought, hmmm this looks good but what if I added strawberries.


So I did and it looked great. It transformed the tower from a dreamy pastel tower of sugary sweetness into a more complex textural and vibrantly coloured dessert offering with a choice for anyone who wanted to join in but still be healthy.

Or something like that. It looked good and it tasted great so I guess that is the main thing.

I did think about dipping the strawberries in white chocolate coloured pink and adding some more sugar flowers but that would take away some of the texture and colour, plus I mostly believe that the strawberries are best on their own. This way you can have the fresh fruit and then a macaron as well.

I was a little worried that the strawberries would weep and ruin the tower, but I left it out for a few hours as an experiment and it still looked great with just minimal juice running down the fondant (note the weather was mild when I tried this out).


How to make a macaron, marshmallow and strawberry tower
This is a modified version of my last post just replacing the mini macarons. Make sure everyone eating from the tower knows there are toothpicks being used and check kids marshmallows before they eat them to ensure sticks have been removed.

Styro foam cone 10cm (4") bottom by 25cm (10") high (available craft stores)
Ready Roll Fondant
Large Rolling pin
Toothpicks
8-10 medium strawberries washed, dried and with the leaves cut off
15-20 regular macarons (Click HERE for macaron recipe)
up to 40 marshmallows (mine from Big Lolly)
Sugar Flowers (CLICK HERE for instructions to make your own)


Knead fondant, dust workbench and roll out fondant until quite thing. Brush the cone with water and then wrap the fondant around cutting off any excess at the back where it joins and pressing the fondant down it into place on the cone. Use fondant smoothers if you have them otherwise you can use your hands,

Cut toothpicks in half and starting at the top push a toothpick into the cone through the fondant. Stick a strawberry onto the toothpick and then repeat the process working your way down in a softly spiraling line as shown in the picture (the picture shows mini macarons instead of strawberries). This will be the front center of your tower so make sure it is adhered in a pretty even line. Push a whole toothpick into the top point of the fondant covered cone.


Starting at the top again attach a layer of marshmallows on either side of the strawberries. I used toothpicks in the picture, but you can use royal icing# to adhere the marshmallows as the toothpicks can lodge in the marshmallows when being removed.

#do not adhere macarons with royal icing as the delicate shells will not easily lift off, toothpicks do not stick to the macarons the same as they do marshmallows.

Work a layer of macarons on each side of the marshmallows. Continue to adhere marshmallows and macarons to the back of the tower. The back of the macaron tower will not be as pretty as the front, but try to work the macarons and marshmallows in a design that looks even.

Finish the tower off with a regular sized macaron at the top of the cone (in the whole toothpick you popped in the top at the start).

Using royal icing adhere a few sugar flowers to the macarons as decoration.


Linda Vandermeer is a blogger, baker, maker and author of the cookbook ' Sweets on a Stick': More than 150 kid friendly recipes for cakes, candies, cookies and pies on the go!. Published in the US the book is available at most online book stores.

Original Ideas, photography and recipes by Linda Vandermeer do not reuse without permission.  


Tuesday, July 29, 2014

Sweet Strawberry Cookies


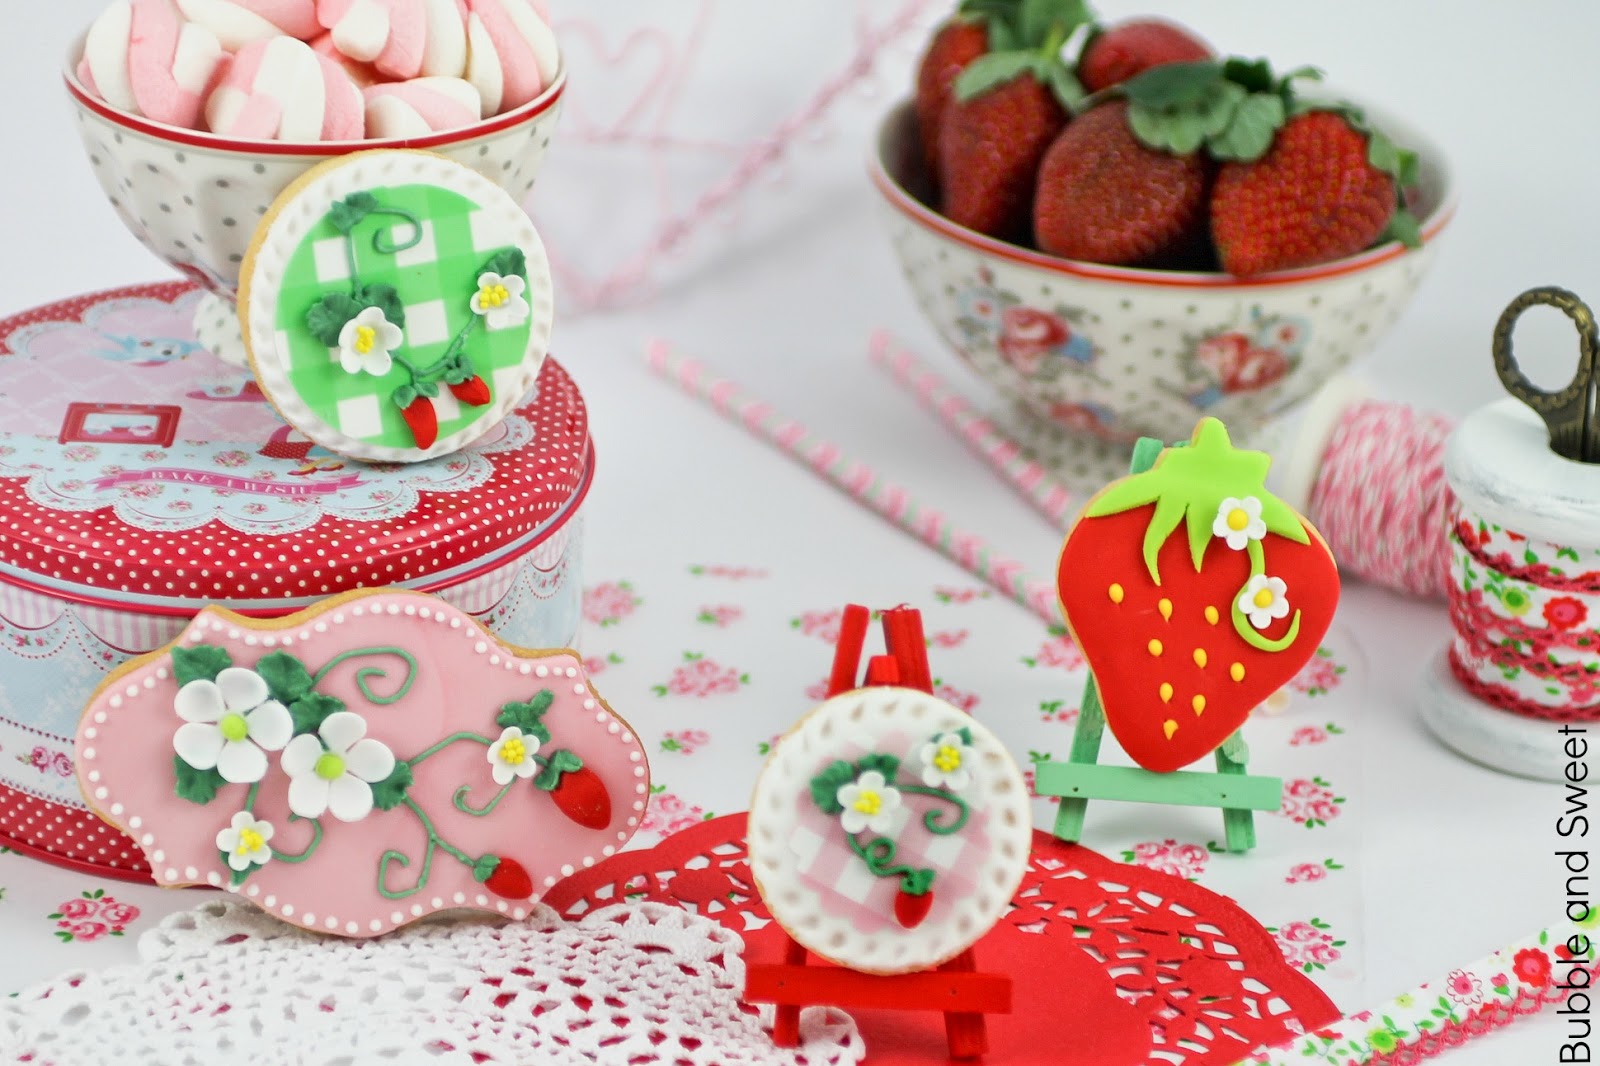
My niece had an adorable Strawberry themed birthday party on the weekend and I made up some cookies to go onto the party table.

Strawberries are so yummy and cute, I don't even know why I haven't had my own Strawberry party yet. Did I mention it was adorable? A-dor-able!


Plus there are so many cute things you can pick up for a bargain to match a strawberry theme. Hello red polka dots or pink and lime gingham. Plus ready made strawberry piñata's for decoration, oh my goodness it's a strawberry theme party decorators dream at the discount stores.

Anyway, like I said I was making the cookies plus some macarons, so about 10 days before the party I rang up my Sister in law (SIL) and said 'Hey I think I'll make the cookies this weekend because they keep really well and then I can just make the macarons the Friday before'.

Y'all know because macarons are best when they have sat in the fridge for at least a day so I was thinking I had it all planned.


So I heard a moments silence, and then my SIL let me know the party was actually in 3 days time, and that my own daughter's birthday party was the one in 10 days time (yup forgot my own daughter's party date...... more on that revelation in another post).

Eeeek! Anyhoo people that know me are probably not very surprised with this story.

So I started making cookies as soon as I hung up the phone and came up with this cute set to match the rest of the party.


Luckily I was able to quickly get some edible frosting sheets from Caketopia in pink and lime gingham which pretty much made decorating so much faster, and easier, and did I say faster 'cause that was really important.

Seriously people edible frosting sheets - try it, the ones I got from Caketopia were so easy to use.

The bigger plaque cookies were not exactly what I wanted, I was hoping to do pink and white royal icing stripes, but seeings as I was working on a new super short timeframe I was pretty happy with how they ended up.


Scroll down below for the step by step instructions on how to make your own strawberry cookies.
Plus if you like my strawberry cookies you might like these from some of the blogs I follow:

3D Strawberry Sugar Cookies - by Munchkin Munchies
Pretty summer Strawberry Cookies (on a square cookie) by Sugarbelle
How to make simple Strawberry Shortcake cookies by Sugarbelle (includes cookie cutter hack)
Shortbread Strawberries (with Kawaii faces) by Butter Hearts Sugar
Simple Strawberry Cookies by Bake at 350

I've also popped up a free video tutorial of me making the strawberries cookies here:


Sweet Strawberry Decorated Cookie
The cookie dough recipe made up at batch of over 30 cookies. If you like you can add raspberry flavour to your red fondant to improve the taste - I did.

Strawberry shaped cookie (CLICK HERE for my favourite vanilla cut out cookie dough)
Strawberry shaped cookie cutter
Fondant (Red, green, white and yellow) either buy already coloured or buy white and colour with gel food colours^
cornflour (cornstarch)
clean brushes and water
sharp knife
small plastic rolling pin
small blossom cutter - mine is an ejector cutter
small fondant ball tool
dresden tool
non stick foam

^fondant dries out quickly, when not in use store in an airtight container or ziplock bag. To use fondant knead until pliable and smooth and roll out on a workbench dusted with cornflour (cornstarch). 


Knead the red fondant until smooth and pliable. Dust workbench with cornflour (corn starch) and using the small plastic rolling pin roll out fondant until quite thin then using the strawberry cutter cut out a fondant shape.


Use the sharp knife to cut off the top section which resembles the leaves/stalk.

Brush a small amount of water onto the cookie and adhere the red fondant shape to the cookie, use the rolling pin to roll/push the fondant into shape if it is a little smaller than your cookie.

Knead the green fondant, dust the workbench and roll out the fondant. Cut out another strawberry shape, you only need the top third of the shape so you only need to cut that much out.


Using the sharp knife cut the stalk and leaves of the strawberry as shown in the picture.

Brush a little water onto the top of the cookie and a very small amount onto the very top of the red fondant and adhere the green stalk and leaves to the cookie.

Using your fingers roll out a long thin strip of green fondant to make a vine, I like mine to taper at the end, place it onto the cookie twisting it until it resembles a curly vine and press into place, if the fondant  has not dried it should stay in place, if the fondant is a little dry use a tiny amount of water in one or two spots to stick the fondant in place. Remember when you press the blossoms in at the next step they will also help secure the vine. Cut any excess off where the vine meets the leaves at the top with the sharp knife.


Make the small 'strawberry' blossoms. Dust the workbench and roll out the white fondant, use the ejector cutter to cut out 2 small blossoms. Place the blossoms onto the non stick foam pad and press the ball tool onto each of the petals to make the petals thinner and cupped in shape. Pop the 'strawberry' blossoms onto the cookie on the fondant vine as shown in the picture, one at the top and one half way along and press into place. *Roll a small amount of yellow fondant into a ball and press into the center of the blossom.

(I actually have a whole tutorial on making simple sugar flowers CLICK HERE)

Using the knife or a fondant tool, press indents into the red fondant where you would like to place strawberry seeds. *Roll tiny pieces of yellow fondant into seeds and press into place with a fondant tool.

*Note the blossom centers and seeds can also be made by piping yellow royal icing.

Decorated cookies can be made a week in advance and stored in airtight containers.


Linda Vandermeer is a blogger, baker, maker and author of the cookbook ' Sweets on a Stick': More than 150 kid friendly recipes for cakes, candies, cookies and pies on the go!. Published in the US the book is available at most online book stores.

Original Ideas, photography and recipes by Linda Vandermeer unless otherwise stated do not reuse without permission. 


Tuesday, June 17, 2014

Lemon cream and macaron stuffed strawberries


Are these even a thing?  I'm not sure but they did taste really good. I guess they're a thing now.

Delicious strawberries stuffed with lemon cream and then topped with a mini macaron. 

If you don't have mini macarons on hand of course you can just stuff with the lemon cream and top with some sprinkles or chopped pistachios.

I've made these up with leftovers I had on hand, the recipe links to the macaron and lemon cream are in the instructions below.


Macaron Stuffed Strawberries
As mentioned above if you do not have macarons handy you can top with sprinkles or chopped pistachio, and I guess then they would be Lemon Cream Stuffed Strawberries and still delicious :)

Strawberries
Mini macarons (CLICK HERE for recipe, but make the macarons smaller)*
Lemon cream curd (CLICK HERE for recipe)^

Using a sharp knife hull the strawberries. If you would like to stand the strawberries upright, cut a little of the pointed rounded tip off as in the picture.

Place the lemon cream in a piping bag with a ruffle tip (eg Wilton #32 or #199) and pipe a small swirl of cream starting in the hulled hole and working your way around in one swirl.

Push a macaron into the top of each lemon cream filled strawberry sideways as shown in picture.

Best served within a few hours of making.

*When I am making a batch of regular macarons I often pipe half a tray of smaller ones for other decorations. You can wrap in plastic wrap, place in an airtight container and freeze, then defrost still enclosed in the airtight container and plastic wrap in the fridge when you are ready to use them. Wrapping them well as described minimizes the risk of condensation forming on the macaron.

^The lemon cream recipe in the link will make quite a big batch for strawberries, you can half the recipe.


Linda Vandermeer is a blogger, baker, maker and author of the cookbook ' Sweets on a Stick': More than 150 kid friendly recipes for cakes, candies, cookies and pies on the go!. Published in the US the book is available at most online book stores.

Original Ideas, photography and recipes by Linda Vandermeer do not reuse without permission. 


Monday, March 17, 2014

Strawberry Layer Cake and Tickle the Imagination issue 15


Get ready to party! I've shared one of my most requested ever recipes in this months issue of Tickle the Imagination magazine.

This Strawberry Layer Cake has been on the menu for my kids parties for years and it's always a been favorite.


Plus I have included a step by step tutorial to make the modern pressed flowers decorating the cake and a recipe for delicious cream cheese frosting.


Oh and in case you can't tell from my lead it it's Tickle the Imagination's PARTY issue, which is always fabulous! Make sure to check out some of the other amazing articles from some of my favorite contributors.

Tickle the Imagination magazine is available to buy online, at some newsagents or you can read it online free. CLICK HERE for links.


Linda Vandermeer is a blogger, baker, maker and author of the cookbook ' Sweets on a Stick': More than 150 kid friendly recipes for cakes, candies, cookies and pies on the go!. Published in the US the book is available at most online book stores.

Original Ideas, photography and recipes by Linda Vandermeer do not reuse without permission. 


Thursday, December 26, 2013

Pink rose macarons with strawberry


Pink macarons with rose ganache and fresh strawberries

Yesterday was a bit hectic around here so today we are relaxing.

I think we might make some pink iced tea or lemonade and eat left over macarons.


Yup that sounds nice, about the pace I can manage today.

Photo notes:

Rose Macarons - recipe Bubble and Sweet blog CLICK HERE and just add strawberries
Pink Lemonade recipe - CLICK HERE for similar recipe
Rose/gingham tea towel - Ikea Evalill CLICK HERE
Pink Glasses - Ikea Krokett CLICK HERE
Stack of book - Sweets on a Stick: More Than 150 Kid-Friendly Recipes for Cakes, Candies, Cookies, and Pies on the Go! by Linda Vandermeer
Vintage china plate - Montrose Foley (part of a trio)


Linda Vandermeer is a blogger, baker, maker and author of the cookbook ' Sweets on a Stick': More than 150 kid friendly recipes for cakes, candies, cookies and pies on the go!. Published in the US the book is available at most online book stores.

Original Ideas, photography and recipes by Linda Vandermeer do not reuse without permission.


Monday, July 29, 2013

How to Host a Cupcake Decorating Birthday Party - Lilli's 9th Birthday Party


This year for Lilli's birthday party we decided to have a cupcake decorating party and it was a super sweet success.

Lilli is at that in between age where some of the kids get a bit bored with the usual party games we've had in the past. As a compromise we're still having pass-the parcel which is the birthday girl's favourite plus a pretty dessert table (my favourite - make sure to pop back next week to see those pictures) and filling up the rest of the time with cupcake decorating.


The great thing about a cupcake decorating party is that you can go as low cost or fancy as you choose depending on your budget, plus it's great for a wide range of kids (we had 4 years to 9 years olds).

Also, the actual cupcake decorating set up of the party was soooo easy!


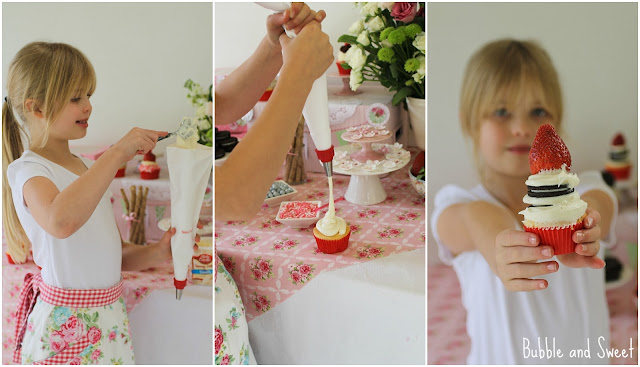
I have to admit, I had a little help in the kitchen. I used Betty Crocker cupcake mix, which comes with ready to spread frosting. I also used a couple of tubs of Betty Crocker's ready-made frosting for extra piping. It made the preparation and clean up a breeze. And, because it's so easy, Lilli helped out baking the cupcakes, which gave us some special family time the night before the party and added to the fun.


Lilli and her friends are a pretty crafty and fun bunch so I thought we would set up a few stations with pictures of a finished cupcake at each station along with the ingredients needed. I explained how to pipe a frosting swirl, how to make a fondant flower or butterfly and a quick description of each cupcake on offer and then let the kids go to it.


Cupcake Decorating Ideas (all cupcakes in the pictures are made using Betty Crocker cupcake mix and ready to spread frosting):  

Pretty flowers and pearls

Ingredients
Vanilla Cupcakes and ready to spread frosting vanilla or strawberry
Sugar flowers (CLICK HERE to make your own or buy premade sugar flowers)
Candy coated chocolate balls* or cashous *sixlets (candy coated chocolate) from spotlight or cake decorating stores, cashous from supermarkets.


Directions
Put frosting into a piping bag fitted with a large open star tip. Starting in the middle pipe the frosting on working your way out in a circle. Top with pre-made sugar flowers and Candy coated chocolate.

Cookies and Cream

Ingredients
Vanilla Cupcakes and ready to spread vanilla frosting
Oreo Cookies


Directions
Chop up a few oreos into small pieces and mix into the vanilla frosting. Put the frosting into a piping bag fitted with a large round tip. Starting in the middle pipe the frosting on working your way out in a circle. Top with a whole Oreo Cookie. Alternately you can spoon the oreo frosting on, smooth into a mound with a knife and top with a whole Oreo Cookie.


Strawberry forever
Ingredients
Strawberry Cupcakes and ready to spread vanilla or strawberry frosting
Strawberries
Pink and white sprinkles


Directions
Spread a layer of frosting onto the cupcake and then dip the top in the sprinkles. Put the extra frosting into a piping bag fitted with a large open star tip. Pipe a swirl of frosting in the middle of the cupcake and top with a whole Strawberry.

Sundae Best

Ingredients
Vanilla Cupcakes and vanilla and chocolate ready to spread frosting
Jaffas
wafers or half flake


Directions
Put vanilla and chocolate frosting into separate piping bags fitted with a large open star tip. Starting in the middle pipe the vanilla frosting on working your way out in a circle. Pipe a small amount of chocolate frosting on the top. Place a jaffa onto the top center of the cupcake and then push a wafer cookie into the top off center.


Let's go crazy * suitable for all age groups

Ingredients
Cupcake and ready to spread frosting any flavour
Assorted lollies

Directions
Place frosting into bowls with flat knife or offset spatula and allow kids to spread the frosting onto the cupcake and then load lollies on as desired.


In the end the cupcake decoration directions were more a suggestion than a rule and the kids had a fun time coming up with imaginative ideas all on their own.

I loved the Oreo stacks they whipped up - cupcake, frosting, Oreo, frosting, Oreo, frosting and topped with a strawberry. Over the top - no way! They were perfect because the kids made them and had so much fun with each other along the way.


Cupcake Decorating Tips

- Don't skimp on the frosting. Go big or go home. I can not stress how important having enough frosting is. Remember these are kids and there WILL be some consumption loss during the decorating. This was one of the reasons I loved using the Betty Crocker tubs of ready made frosting - I had extra tubs on hand in the pantry just in case.

- Also don't skimp on the decorations - same rules apply as frosting.

- Try to make the cupcake designs age appropriate. Younger kids are happiest just adding as many lollies as they can fit, older kids appreciate a few different designs to choose from.


- Disposable icing bags and tips are available at grocery stores.

- Don't overfill the bags, half full is good, and secure the end with a rubber band. Warm hands will make any frosting a little bit runnier, see above tip re disposable icing bags


- It's a great idea to have some cupcake boxes to pop the finished cupcakes into. Mine were from the local discount store $2 for a set of 3. Make sure you write each guests name onto the box so that their fabulous creations do not get mixed up.


Other Party Tips

The rest of the preparation I did the weekend before. I picked up some cupcake boxes from the discount store and Lilli helped me pop them up and then I added a bit of extra decoration myself (yes because I just can not help myself). If you wanted to you could make decorating the box an extra activity for the kids to do themselves at the party.


I borrowed some kids aprons from a friend for the party guests which added to the fun. I have seen some tutorials around to make your own kids aprons from teatowels if you are crafty and can sew a straight line. Although on the day of the party I completely forgot about the aprons because I didn't have them in my preparation area - doh!


We had 15 kids so we used 5 boxes of Betty Crocker cupcake mix to make at least 4 cupcakes each. I found the mixes to be generous and we managed to make 16 cupcakes from each box. Each box of Betty Crocker cupcake mix actually comes with ready to spread frosting in the boxes, we used an extra 3 tubs of the Betty Crocker frosting for piping(see frosting tips above).
 

Lilli picked the invitations, we found these cute pop up cupcake girl ones from Paper Eskimo that were perfect for the party theme they come in a box with pretty matching envelopes and thank you post cards.

Take home party bags - The boxes of cupcakes double as a cake and take home party favour and are really enough. But we did up a little bag for everyone which included some fondant cutters (either flower or butterfly), decorating sugar pearls, cupcake cases and a little bag of lollies. The pink and white spot bags were from my local discount store for $2 or $3 for the set of 10. We popped on a little thank you card that came with the invites that Lilli personally wrote to everyone prior to the party.


Plus everyone took home their own box of Betty Crocker vanilla cupake mix so they could easily whip up their own home baked cupcakes.

Stockist Tips
Cupcake Mixes and Ready to Spread Frosting - Betty Crocker available all supermarkets
Fondant Cutters - Sunrise Wholesaler (similar available cake decorating shops online)
Pop up Invitations -  Paper Eskimo 
Cupcake Boxes and Party Bags - discount/dollar store


Disclosure: the ideas, words and opinions in this post are my own however this post was sponsored by General Mills.